
Before we begin, I would like to mention that if you would rather watch the tutorial it is available here or on Youtube.
This tutorial will demonstrate how to illustrate two types of trees in Adobe Illustrator: a puffy tree and a pine tree.
The tutorial will consist of the following steps:
- Setting Our Boards
- Color Management
- Creating Basic Greenage Shapes
- Creating Greenage Cut-Outs
- Creating the Branches and Stumps
- Greenage Shadows
- Greenage Highlights
- Branches and Stump Shadows
In the end, we will have two beautiful trees that can be used for your next illustration.
1. Setting Our Boards
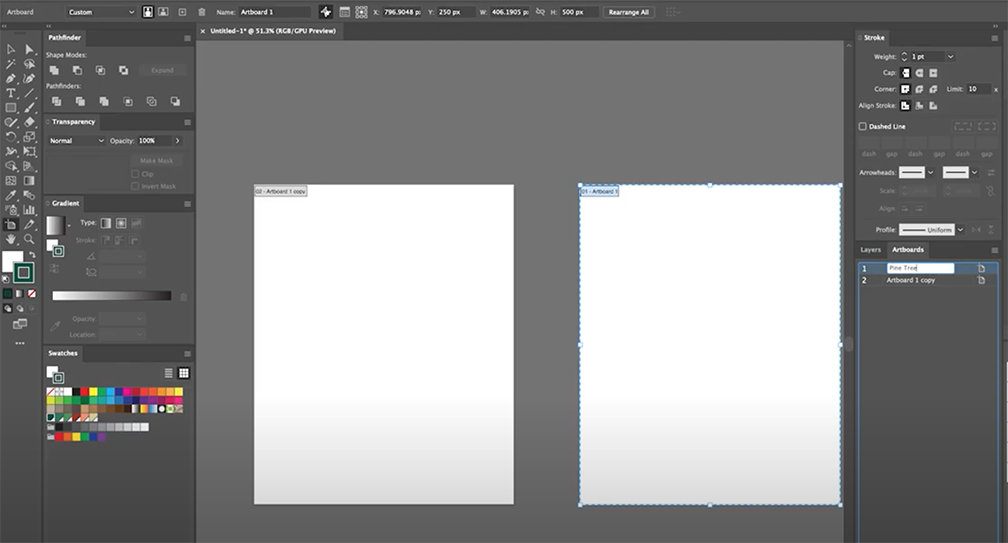
Let’s get started by creating two new named artboards in illustrator: One for the Puffy Tree and one for the Pine Tree. Both trees are created in the same ways with each having slightly different treatments. I will illustrate them both side-by-side to demonstrate to you guys what I do.
You can use the Art Board tool on the left panel or duplicate your existing Art Board by dragging it to another location while holding down ALT.
2. Color Management
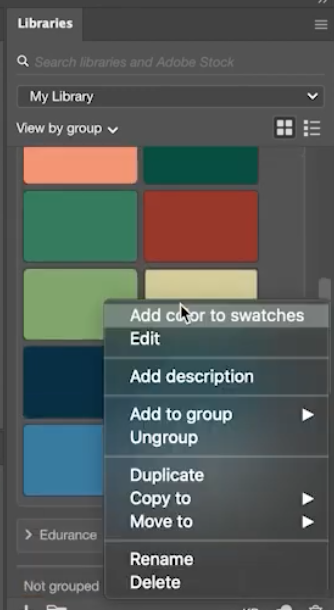
I recommend you save your colors in my Adobe Library so that you can use them for future illustrations. It will save a lot of time because you can add any library colors to the swatches panel by right-clicking on the color and clicking “Add color to swatches”.
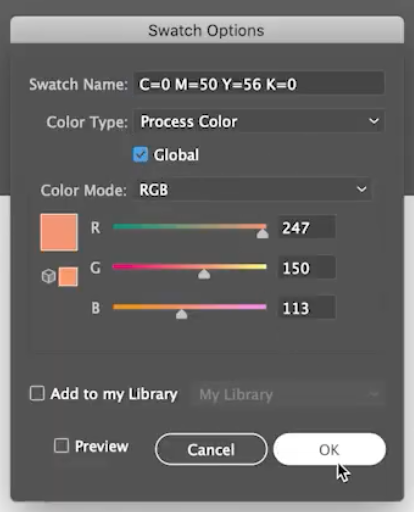
After you have all your colors in your swatches panel, double click on them and set them as global colors so if later you want to change a color swatch, it’ll change throughout the whole illustration.
If you want to use the same colors, below is Hex Code of each color:
Darkest Green #034E42
Dark Green #307C5B
Mid Green #4C955D
Light Greenish Yellow #D4CD96
Pink #F79671
Dark Red #9A3827
3. Creating the Basic Greenage Shapes
We will start by creating a new layer and naming it… greenage shape.
Then we will move forward with creating the general greenage shape of each tree.
Puffy Tree
For the puffy tree we’ll select our medium color green (#4C955D) first and then make the shapes with the Ellipse tool (hotkey L). We will create two ovals one on top of the other. You can create more ovals depending on what structure you want your tree to have. Now, we keep adjusting the ovals shape and location until we get a puffiness that we’re satisfied with.
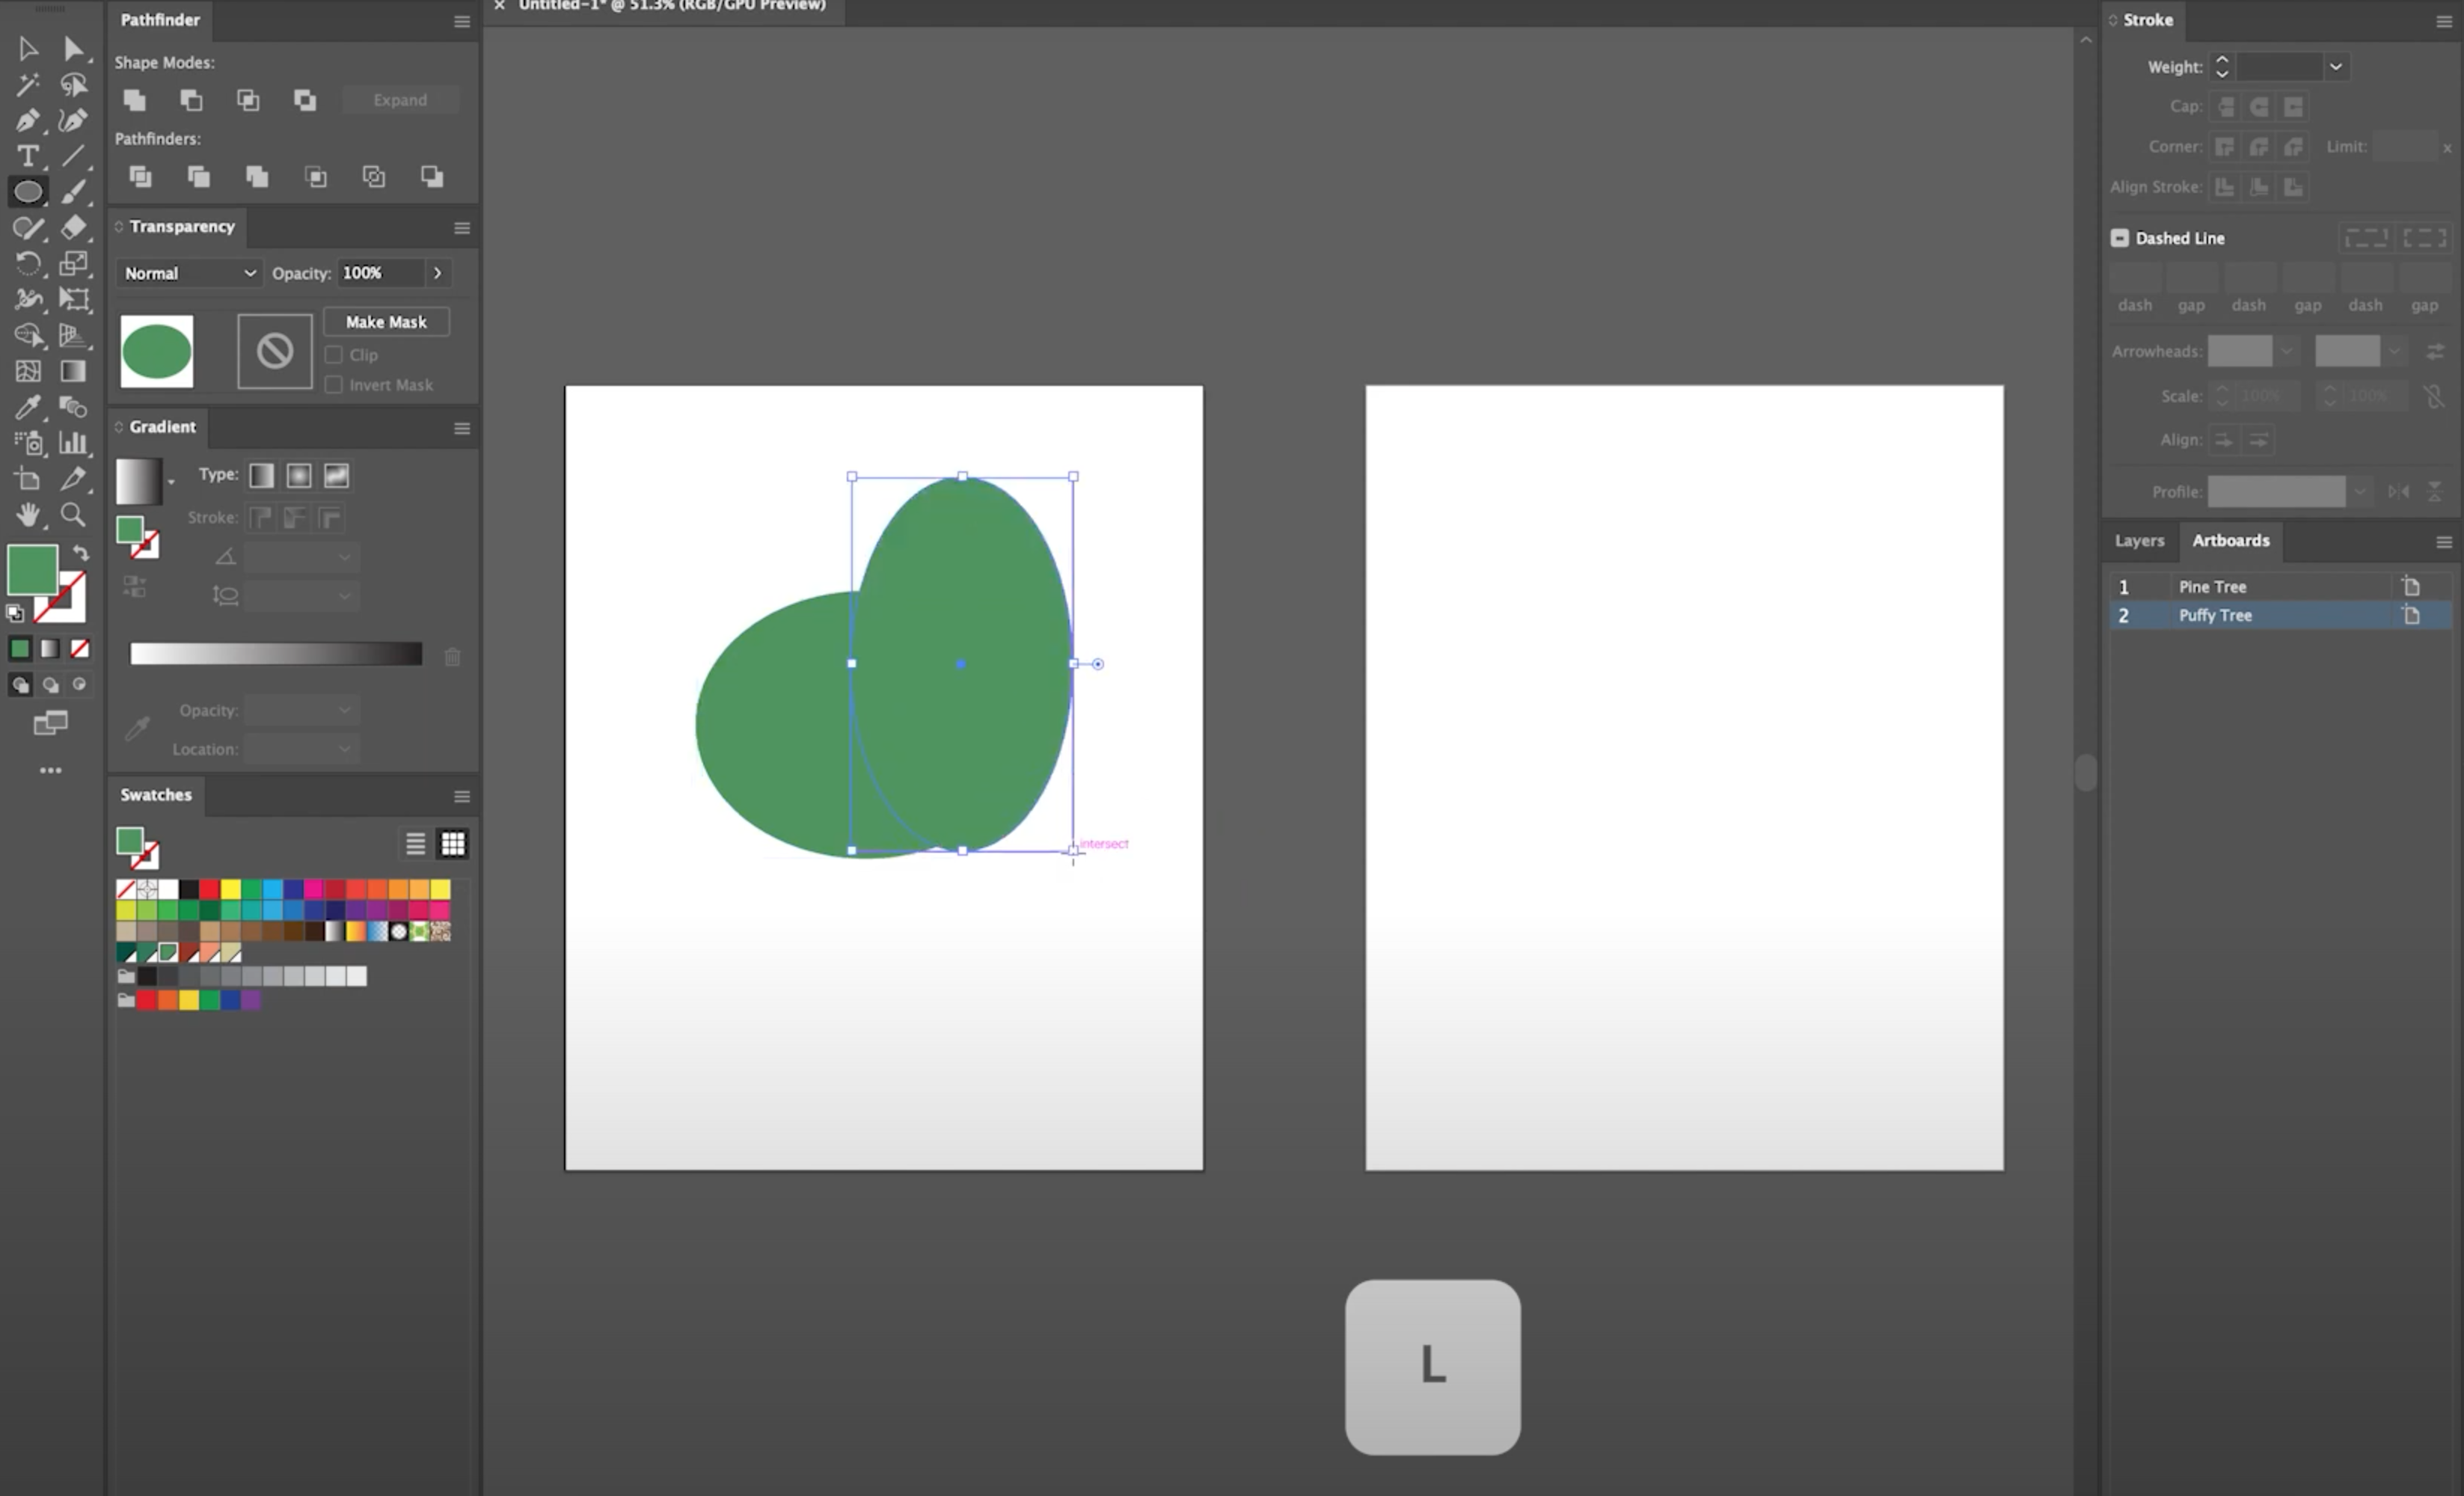
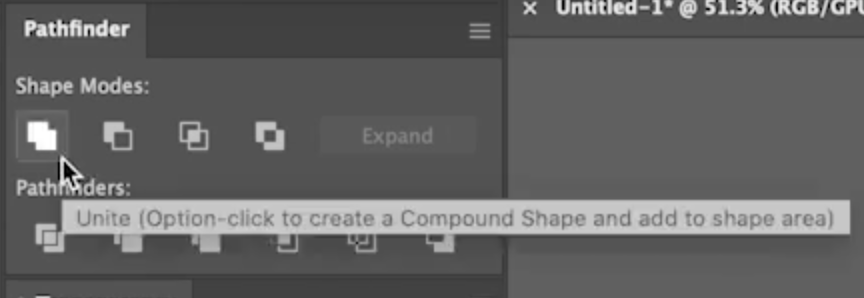
When we have a good shaped puff, we’ll combine the ovals into one shape by selecting them both. With both selected we’ll click the Unite tool in Pathfinder.
Pine Tree
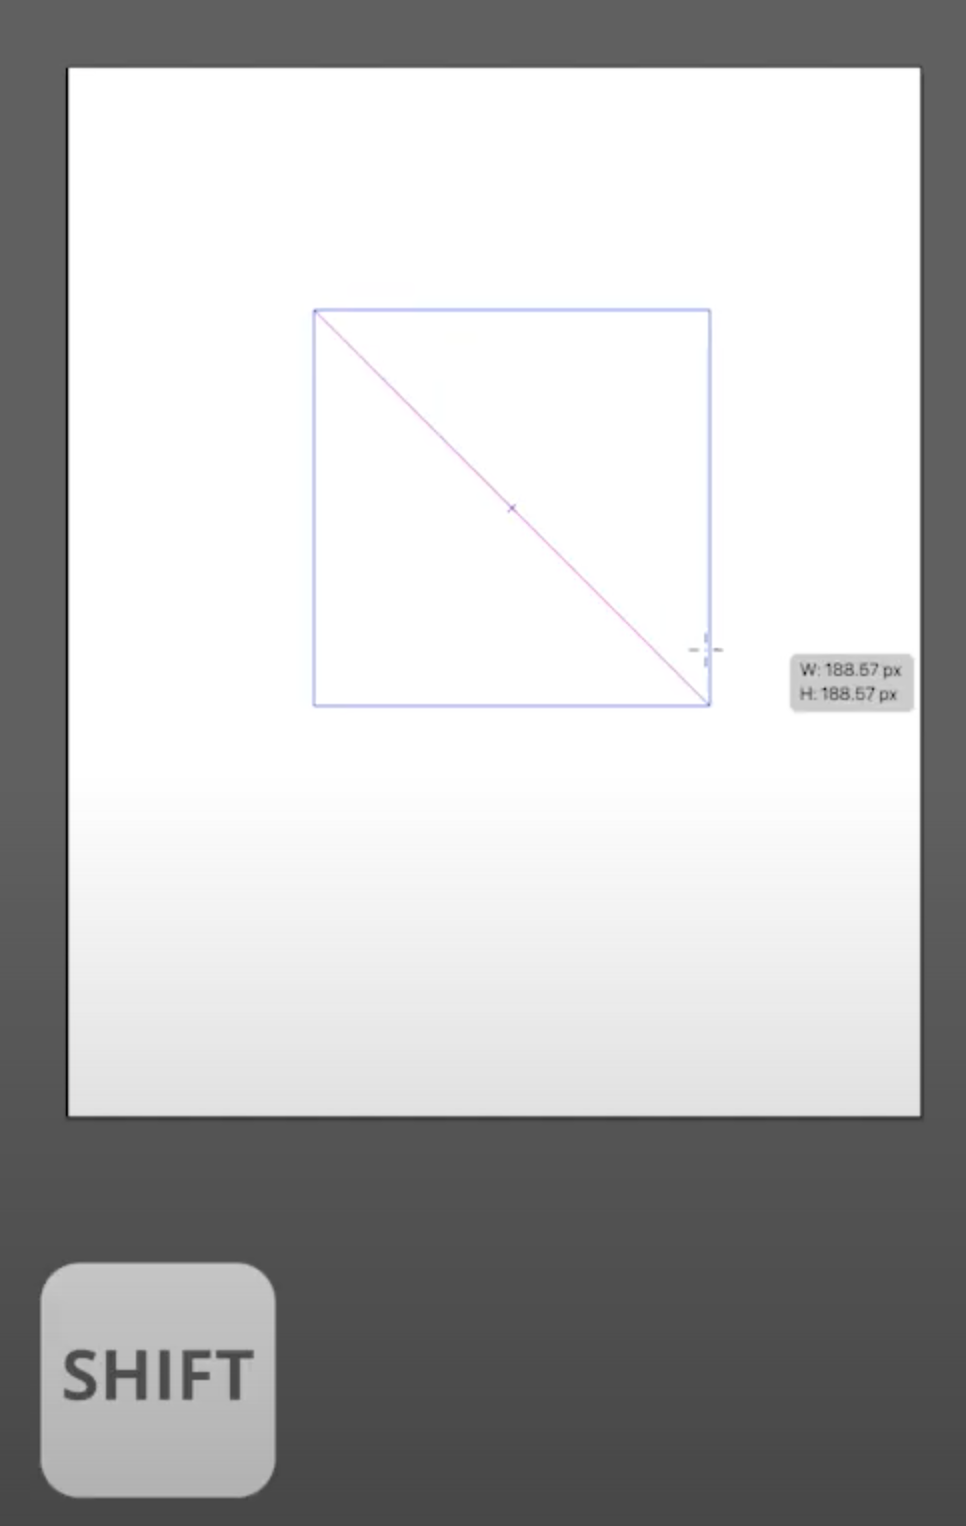
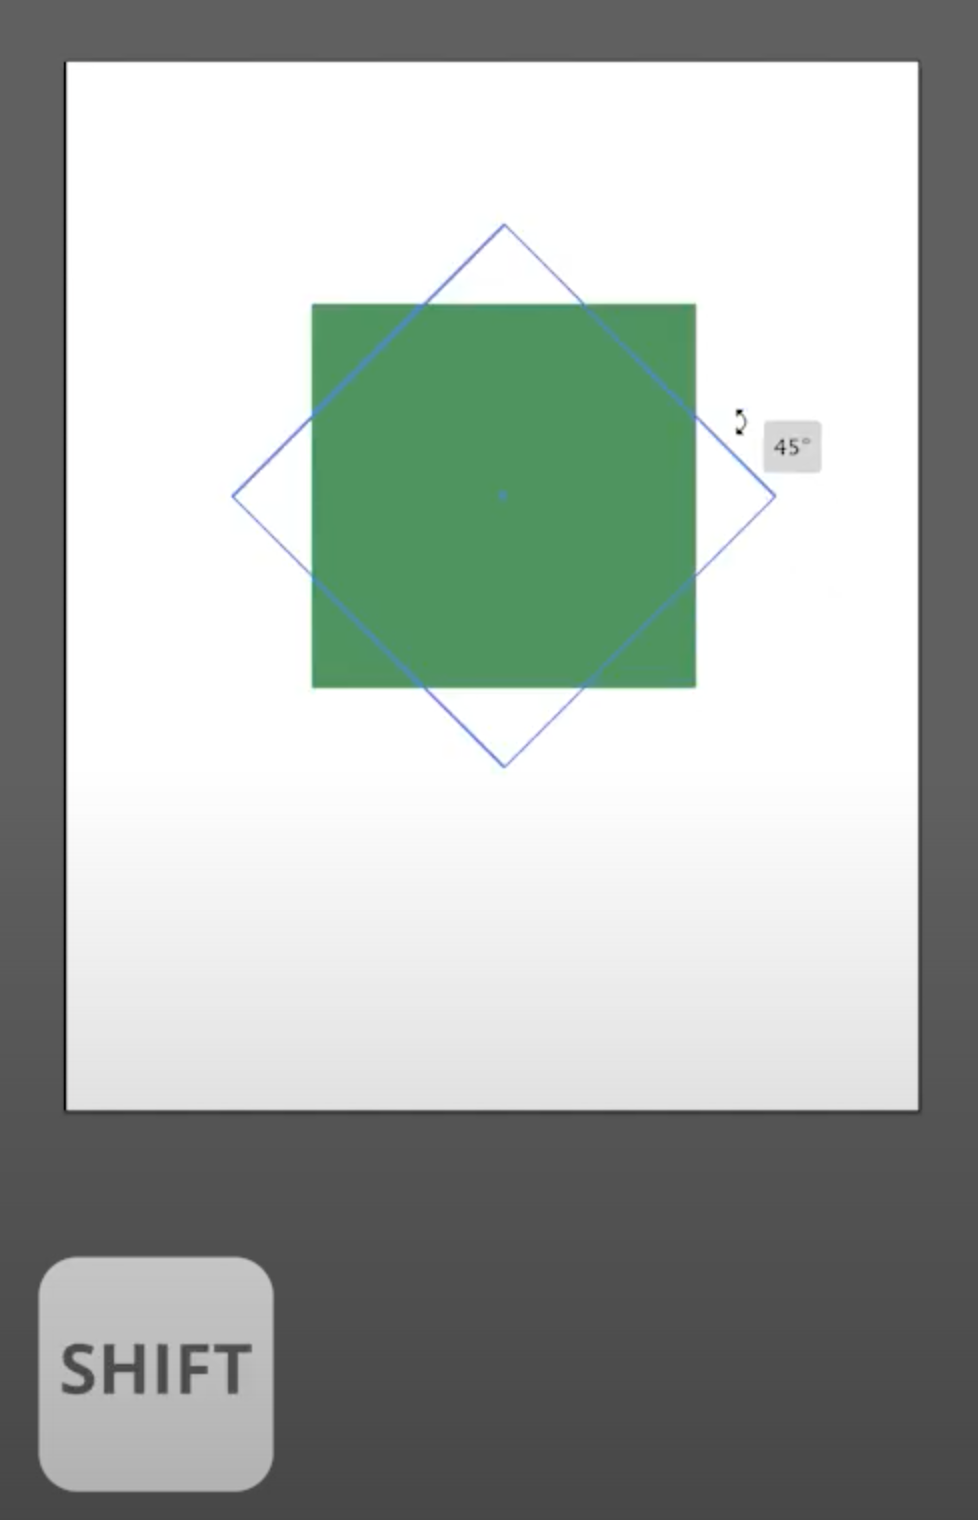
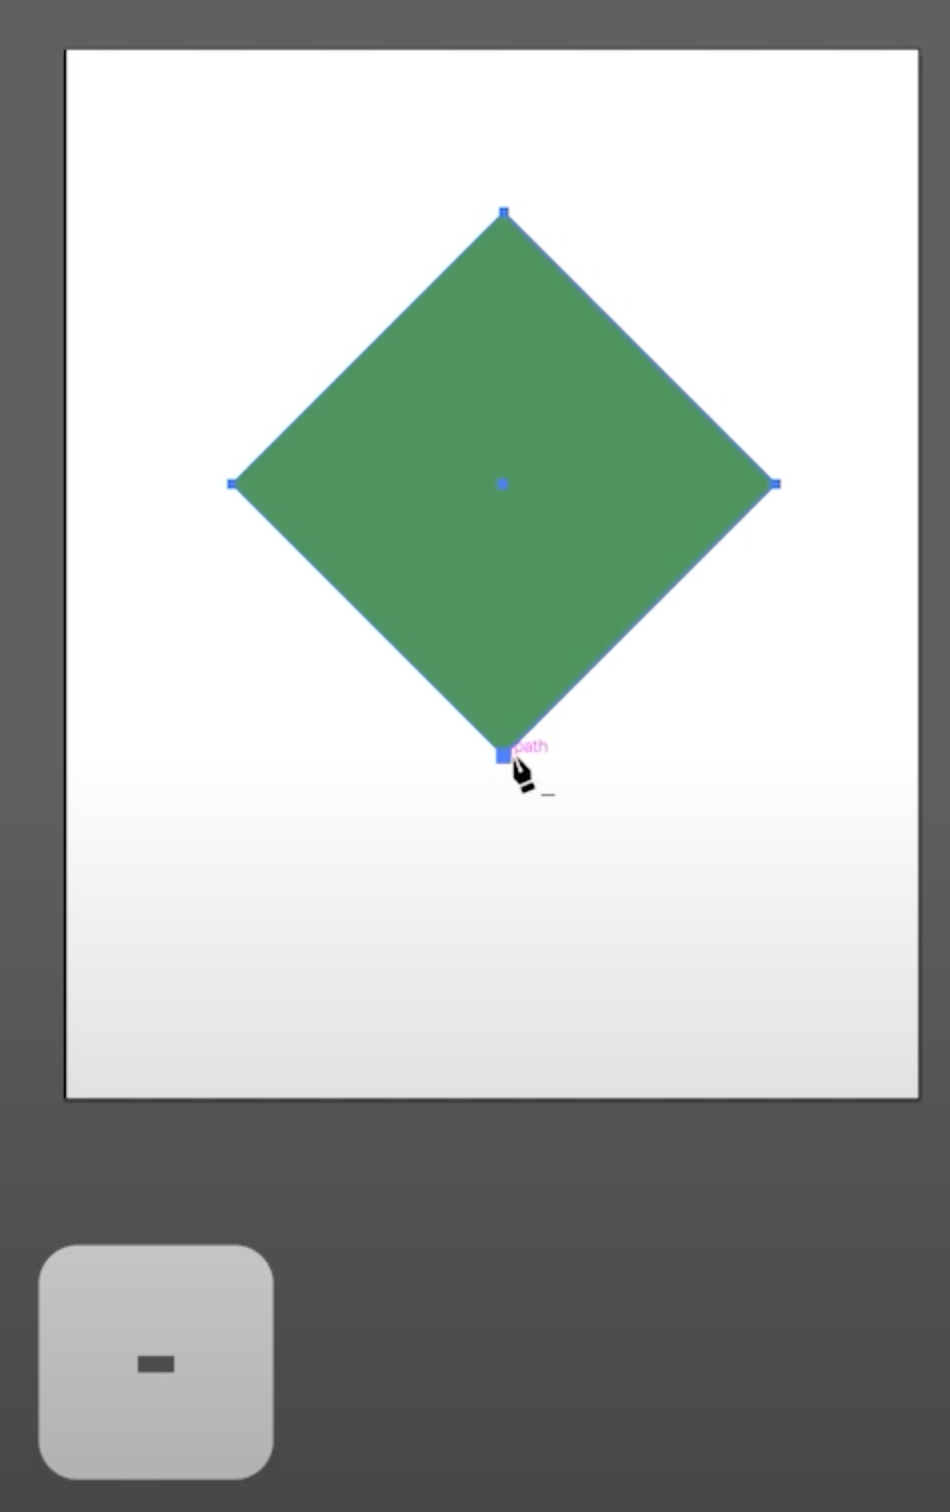
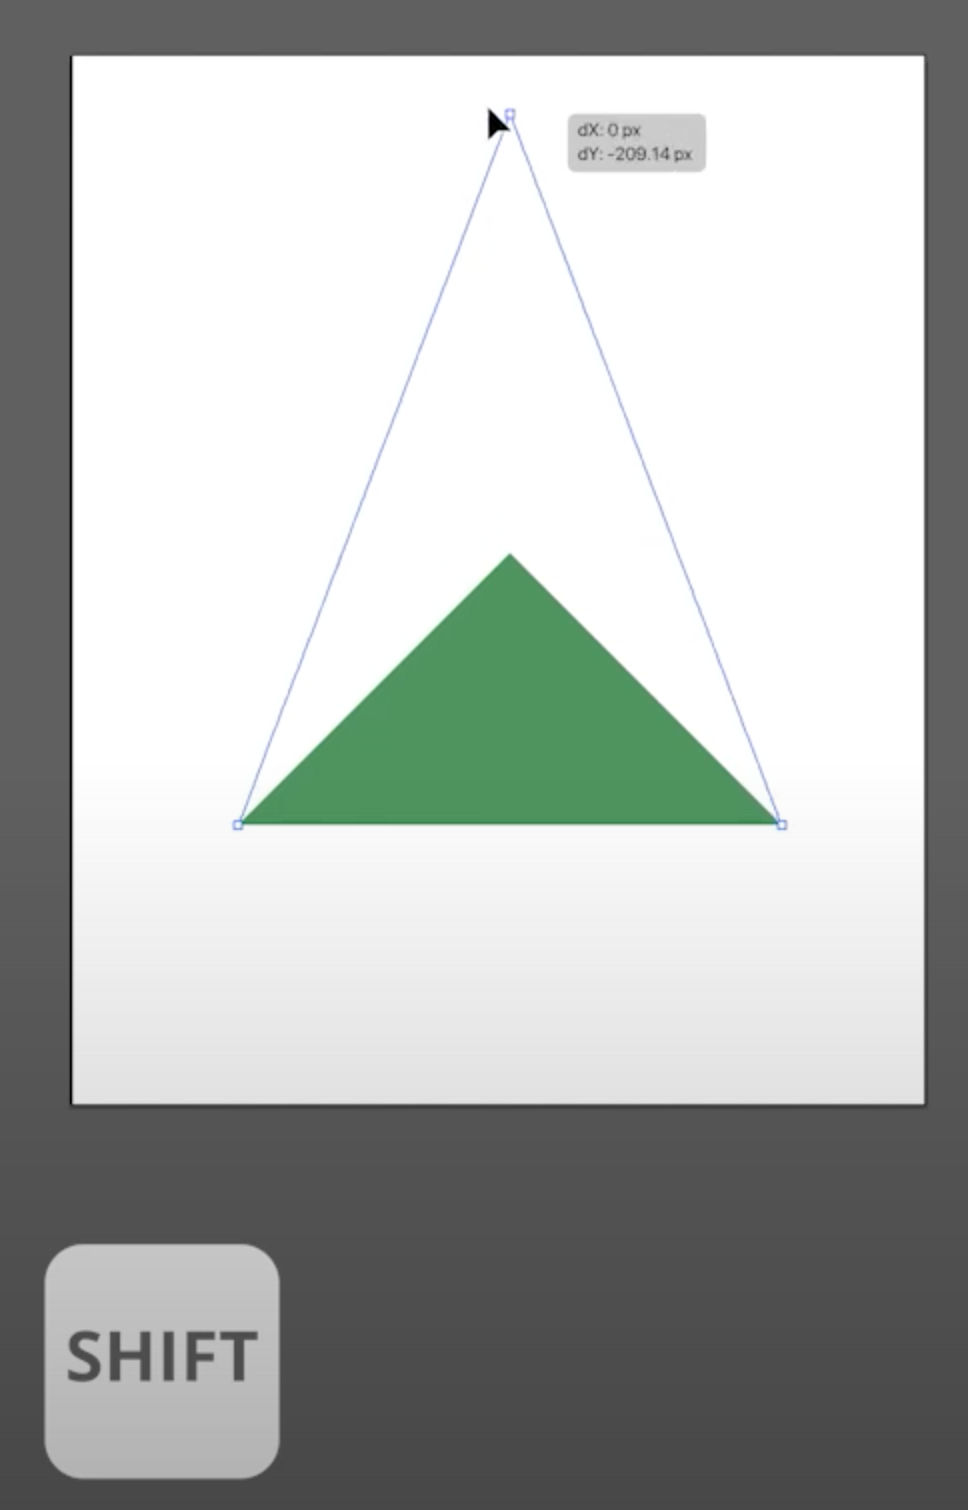
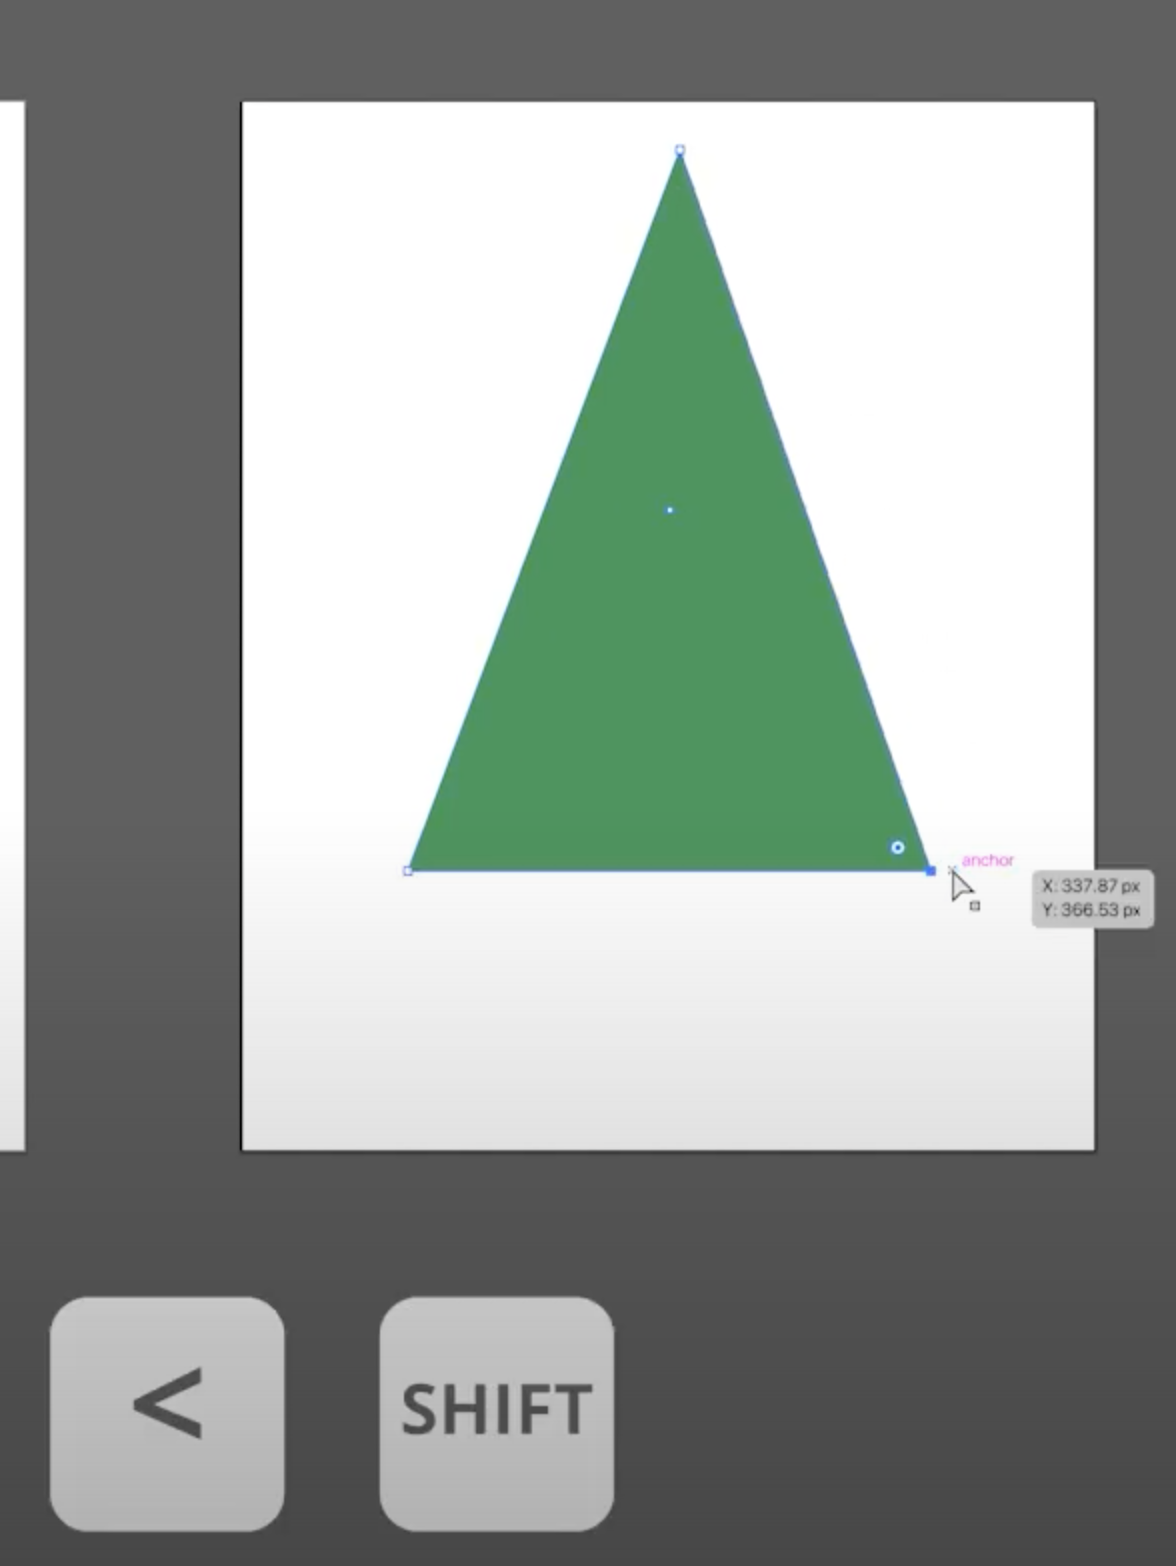
For the pine tree, we want it to be symmetrical. Using the Rectangle tool (M) and while holding down shift, we will drag out a square. We will then rotate the square around to a diamond shape and get rid of the bottom point with the Minus Pen tool (-). After that, move the triangle down a little and then we will drag the top point up to a good height while holding shift to keep it in the middle. And adjust the bottom two points two (shift +< or Shift +>) taps on each side to make the tree thinner.
4. Creating Greenage Cut-Outs
We will now move to making openings in our trees. We are creating openings or cut-outs in our trees because trees in nature are not always so full that you don’t see the branches and the stump behind the leaves.
we’ll use the pen tool to create the cut-outs.
We’ll create a new layer and name it cut-outs
For the puffy tree, we can exaggerate the puffiness more by creating curved cut-outs.
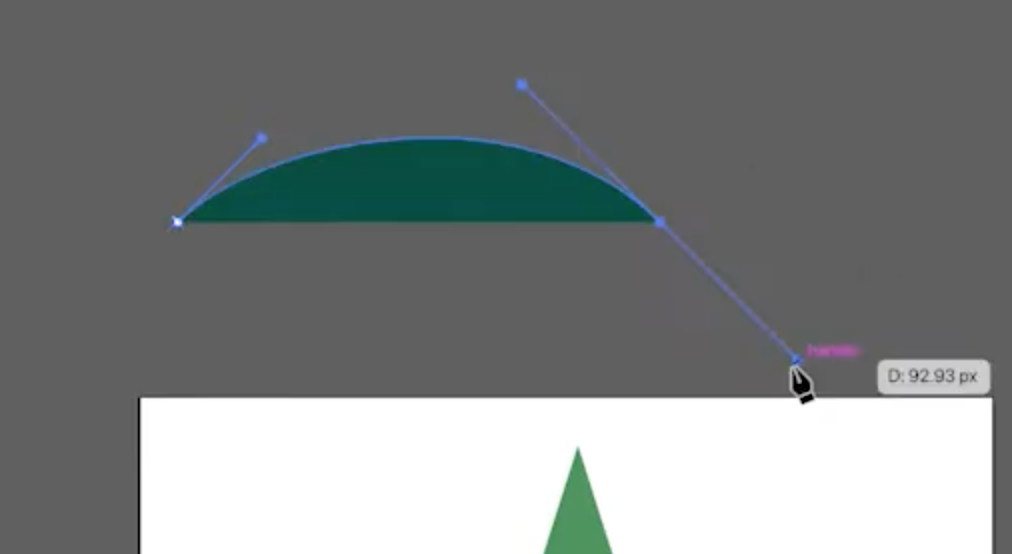
With the pen tool, let’s create a point and drag the anchor up for a curve and we will move then move to the right side and create another point. We will have to drag this point’s anchor up as well to get a smoothen out the curve. We will connect the two points at the bottom and curve the bottom too.
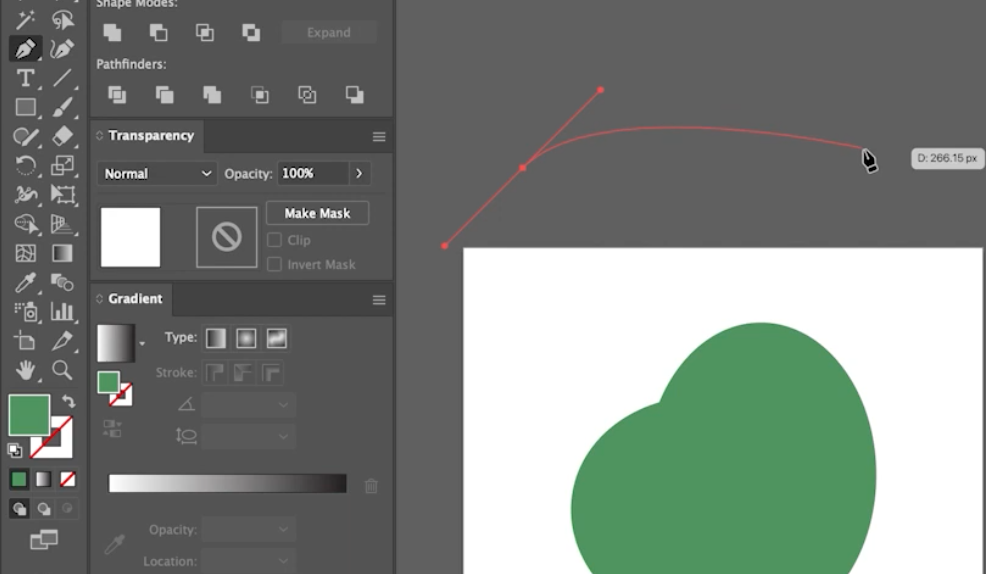
Illustrator will give you a curve based on your anchor. We are going to cancel that out by holding down ALT, click on the right point. Still holding down ALT, we’ll connect the points and set the curve for the bottom.
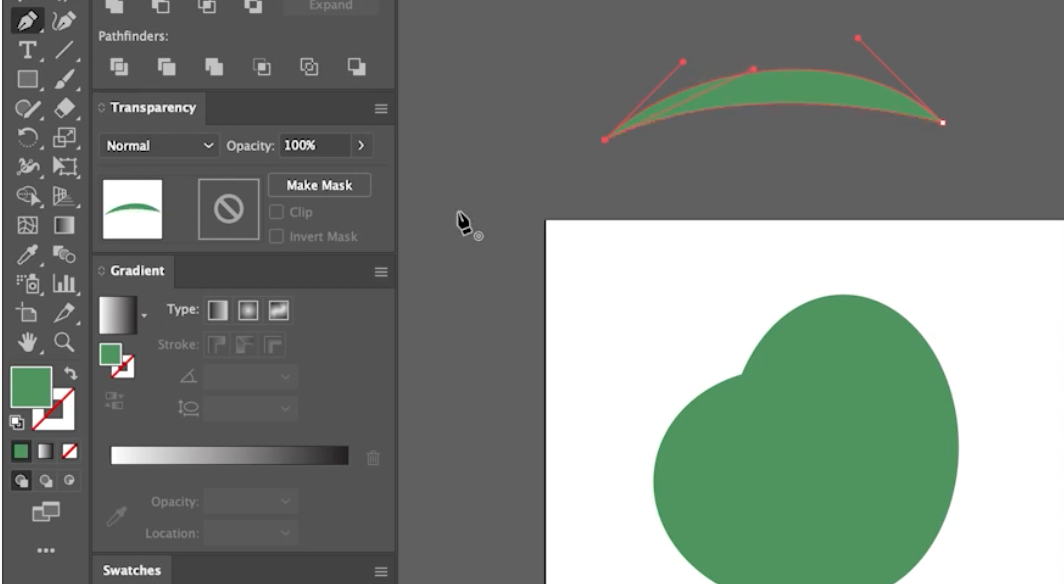
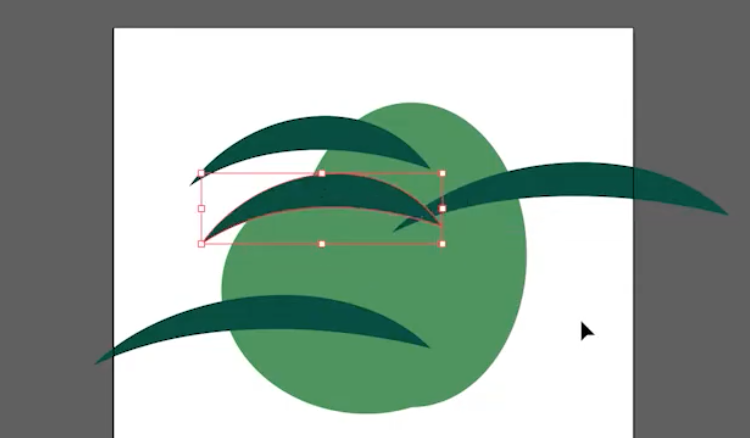
We will move on the shape on top of the greenage and then we will change the cutout color and we will replicate the shape by holding down ALT and dragging the shape and placing it around the tree. We will have to adjust the cut-out shapes until we get what we like.
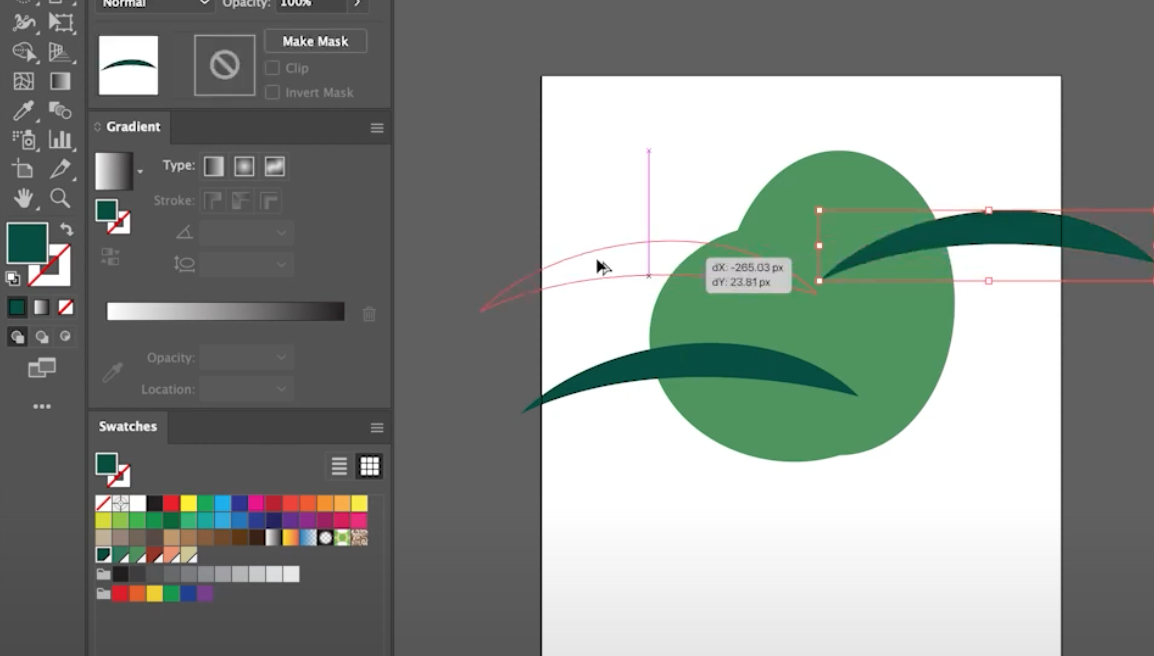
Be sure to not place the cut-outs where it will split the tree into two shapes like the example. Because when we subtract the cut-out shape from the tree, we want to keep it one shape. This will make it easier later to add shadows and highlights when we do clipping masks.
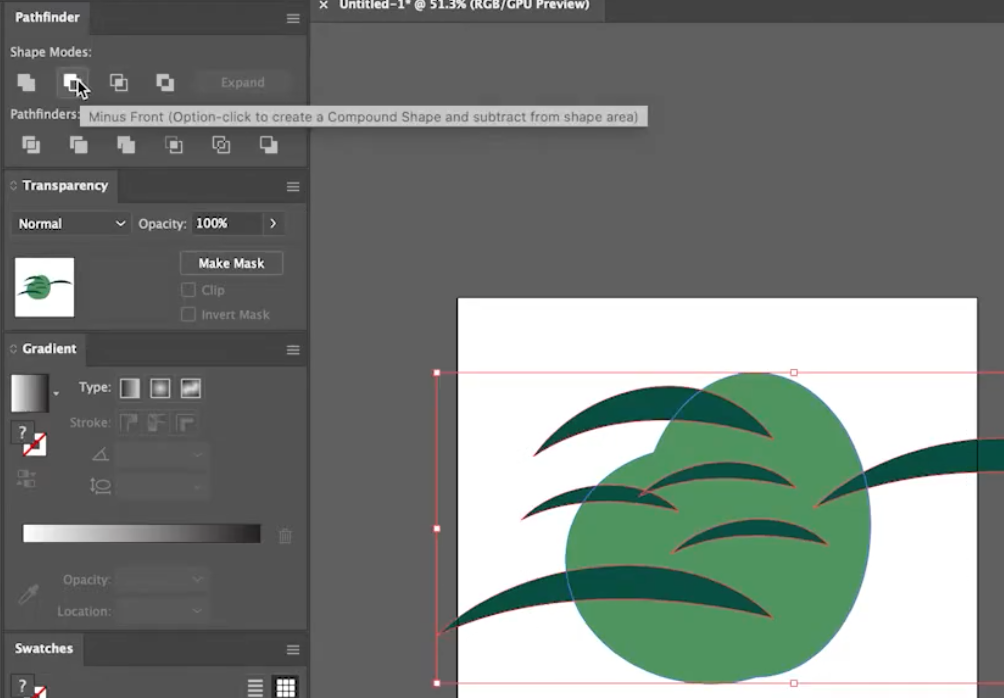
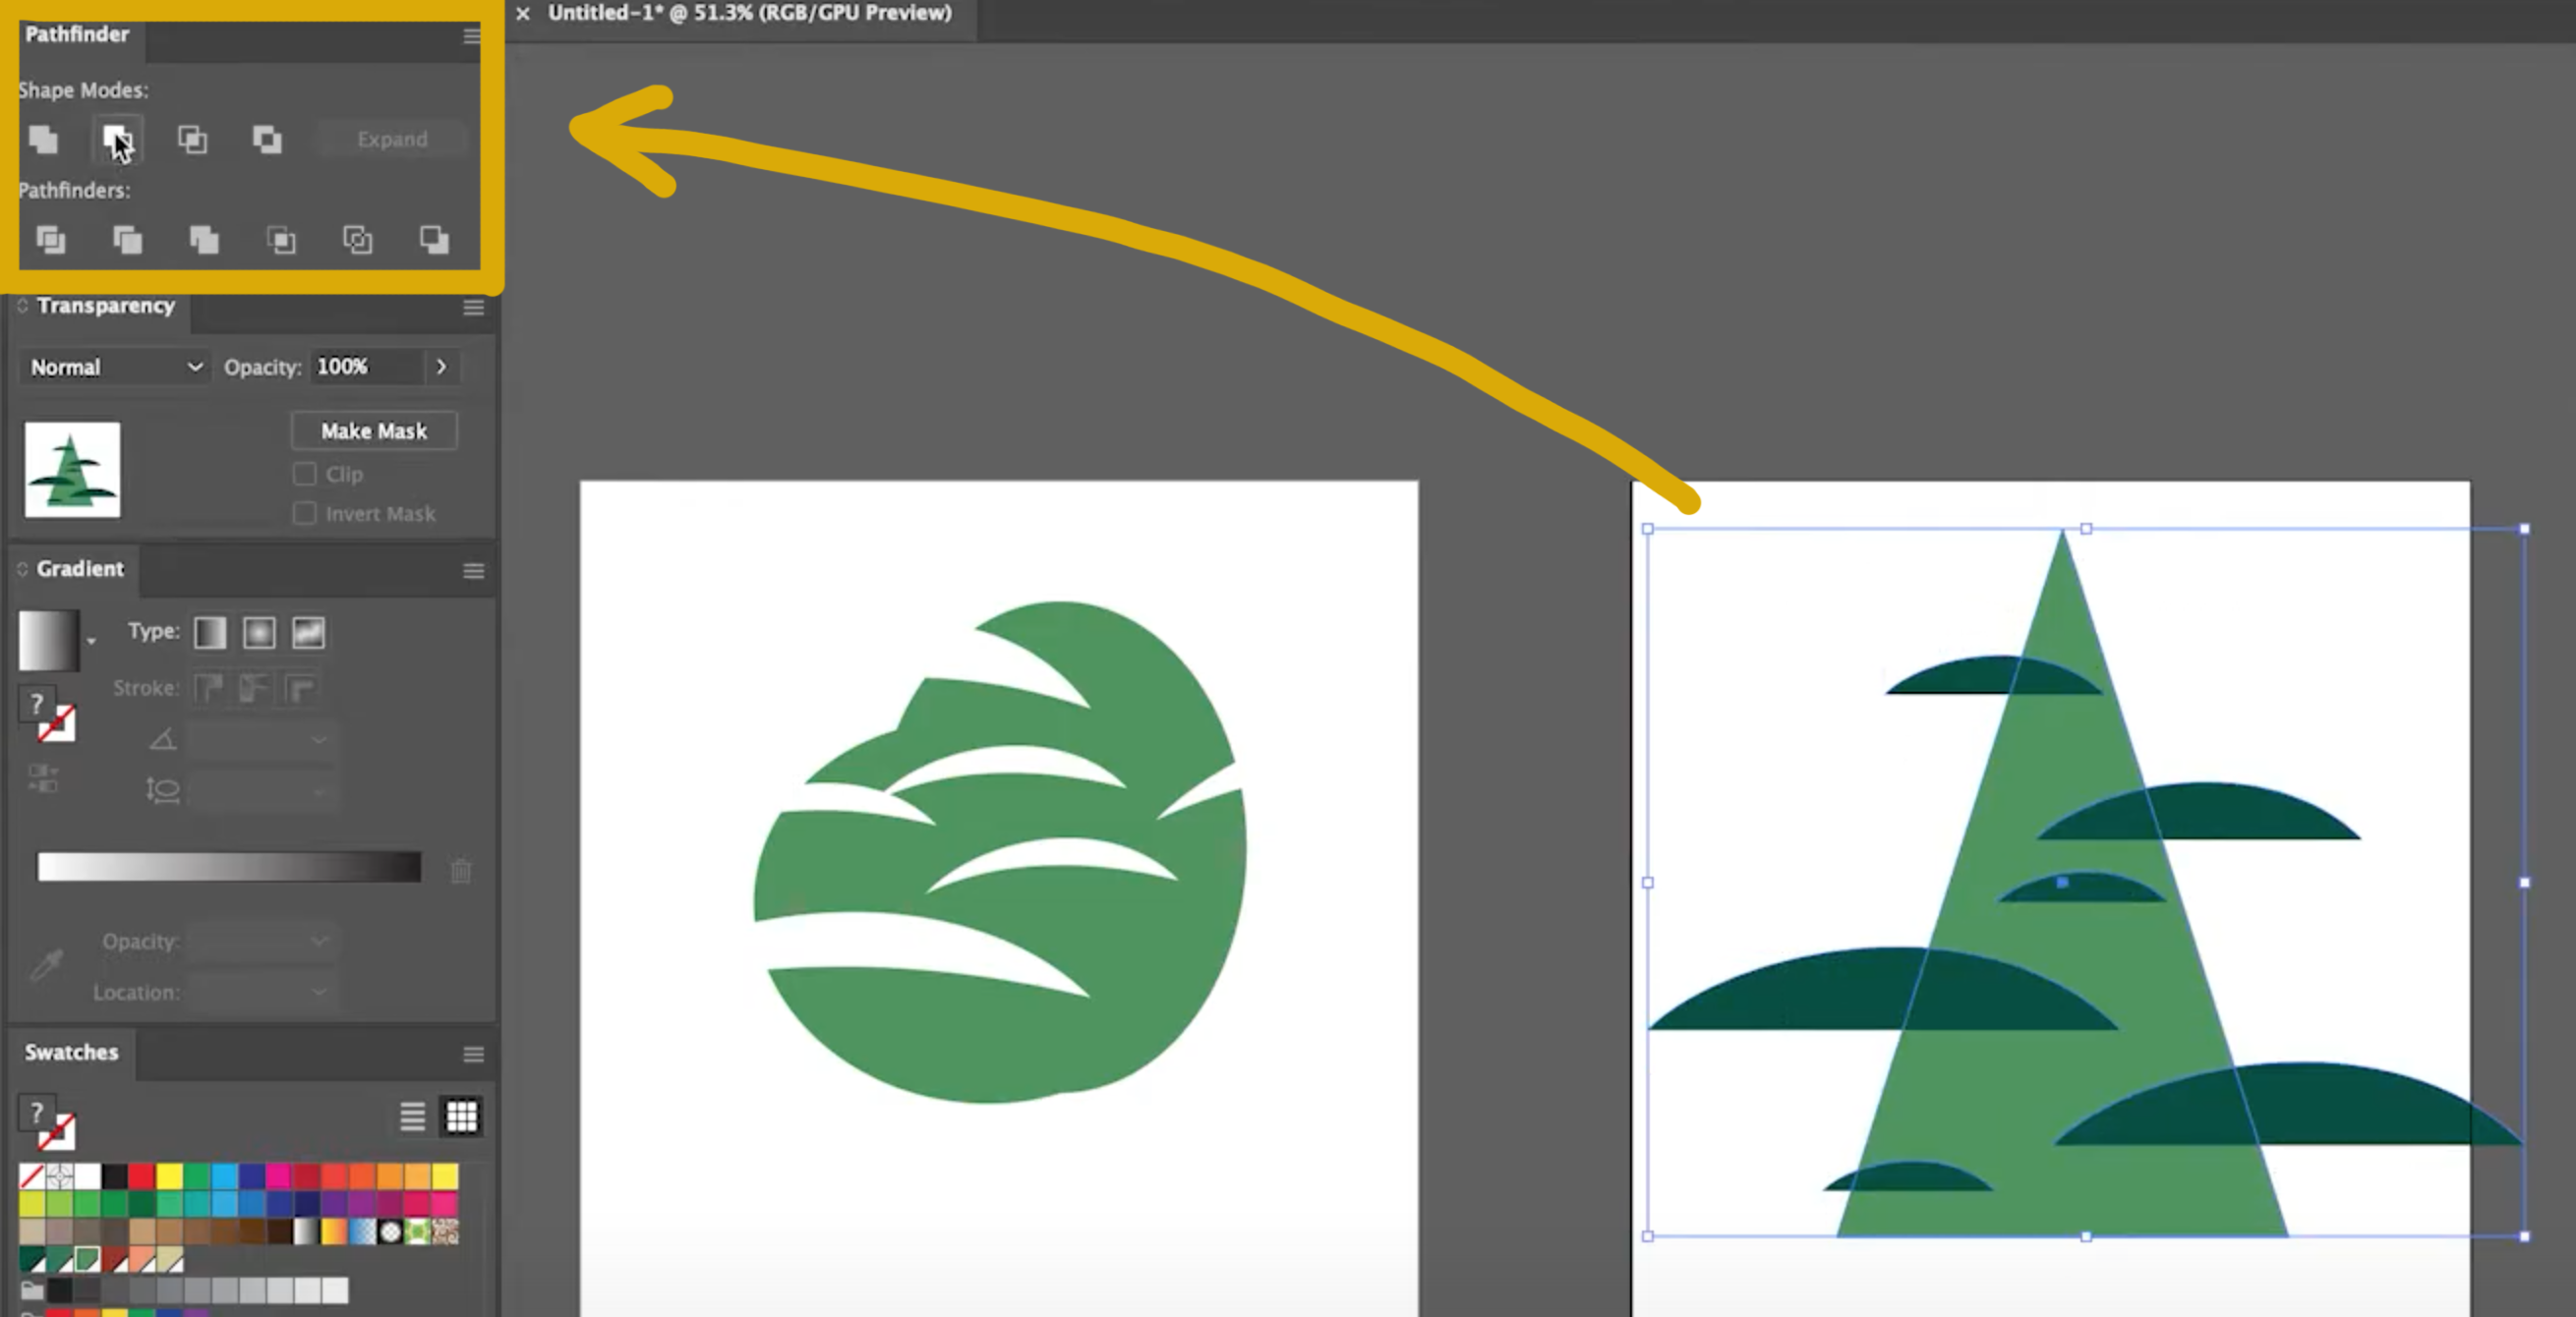
After that select the greenage shape and the cut-out shape of the puffy tree and we will use the Minus Front tool in the Pathfinder.
Pine Tree
Creating the cut-outs of the pine tree consist of almost completely the same steps as the cut-outs for the puffy tree except we will not curve the bottom after we create the two points. We will leave it flat because our pine tree’s greenage base is flat.
After we have the shape, we’ll replicate the shape and place it around the greenage and we can adjust the cut-outs while doing so. When everything looks good, select everything pine tree-related and Minus Front in Pathfinder.
5. Creating the Branches and Stumps
Start by creating a new layer and we will drag it to the bottom since we want the branches to peep through the tree. We’ll lock the top layer and any empty layer. Select the bottom layer again and use the Pen tool (P).
Go over to your color and select your light pink color (#F79671) for the stumps and branches. If the color focus is on fill, we will switch the color to the stroke and click the stroke to make it the focus.
Puffy Tree
We will make the stump for each tree first by creating a point at the top and one further below the greengage shape.
For the puffy tree’s stump, we’ll drag the anchor slightly to give the stump a curve.
The branches will be curved too. Using the pen tool, create the branches by going to the edge of the greenage shape for the first point and back on the stump for the second point. Be sure to drag the anchor slightly on the second point to give it a curve.
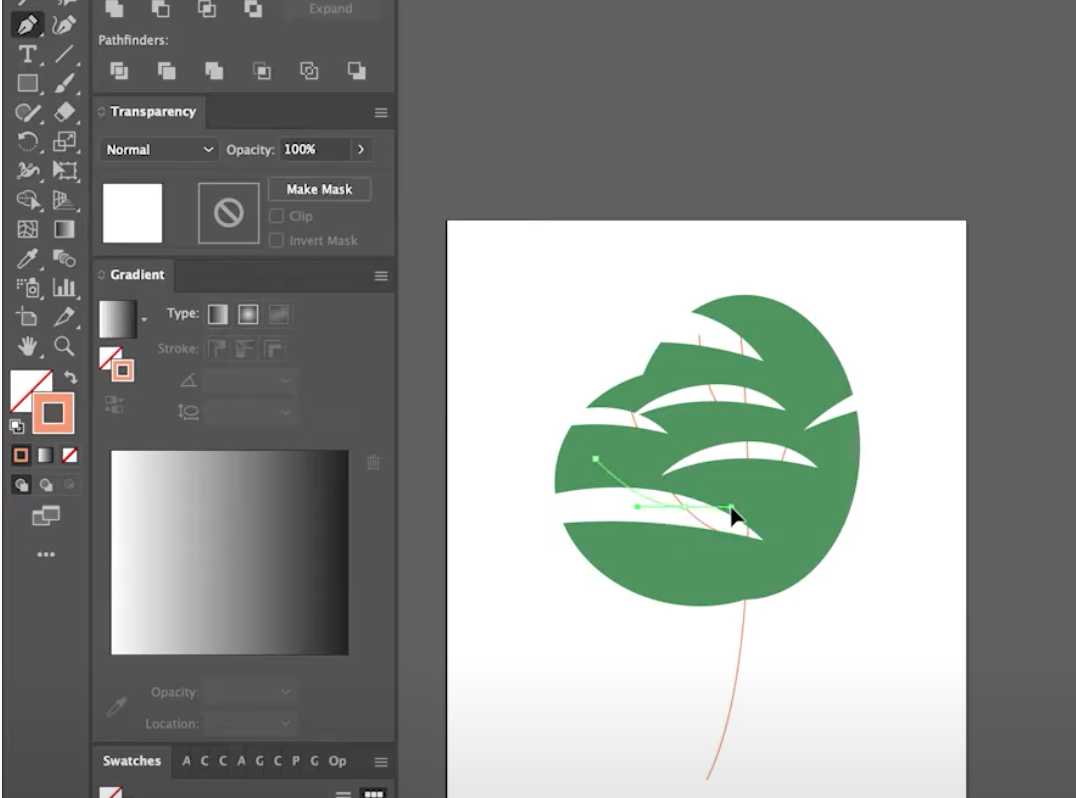
After, we will increase the stroke weight of the stump to 10 points or more. and the branches to half of the stump’s stroke weight.
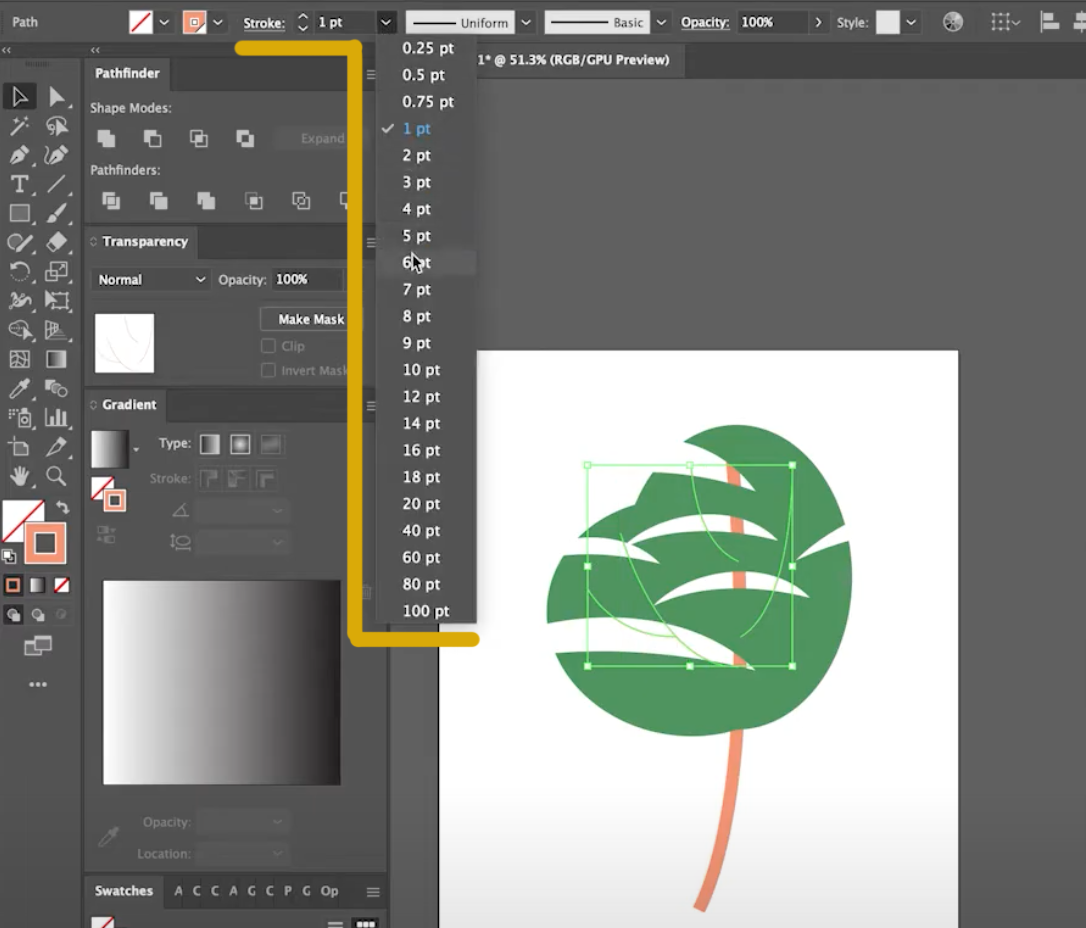
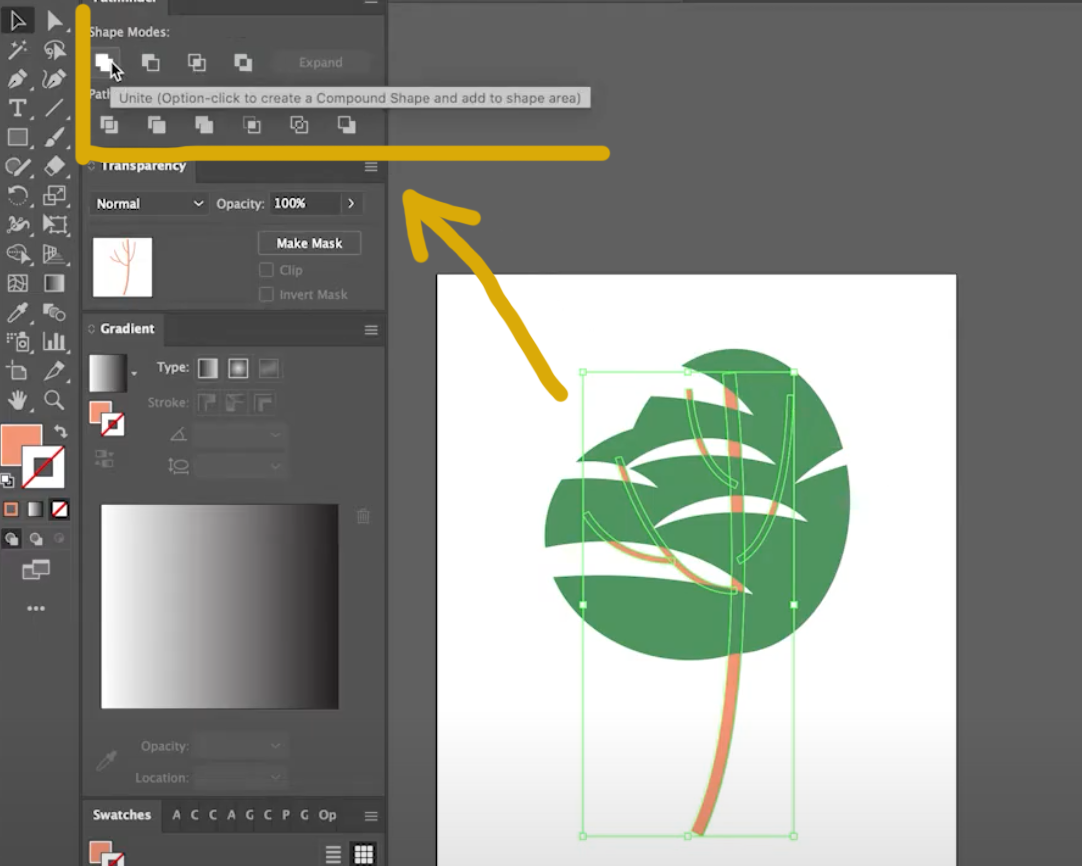
When the stump and branches are set to their appropriate weight, we will combine them all into one shape.
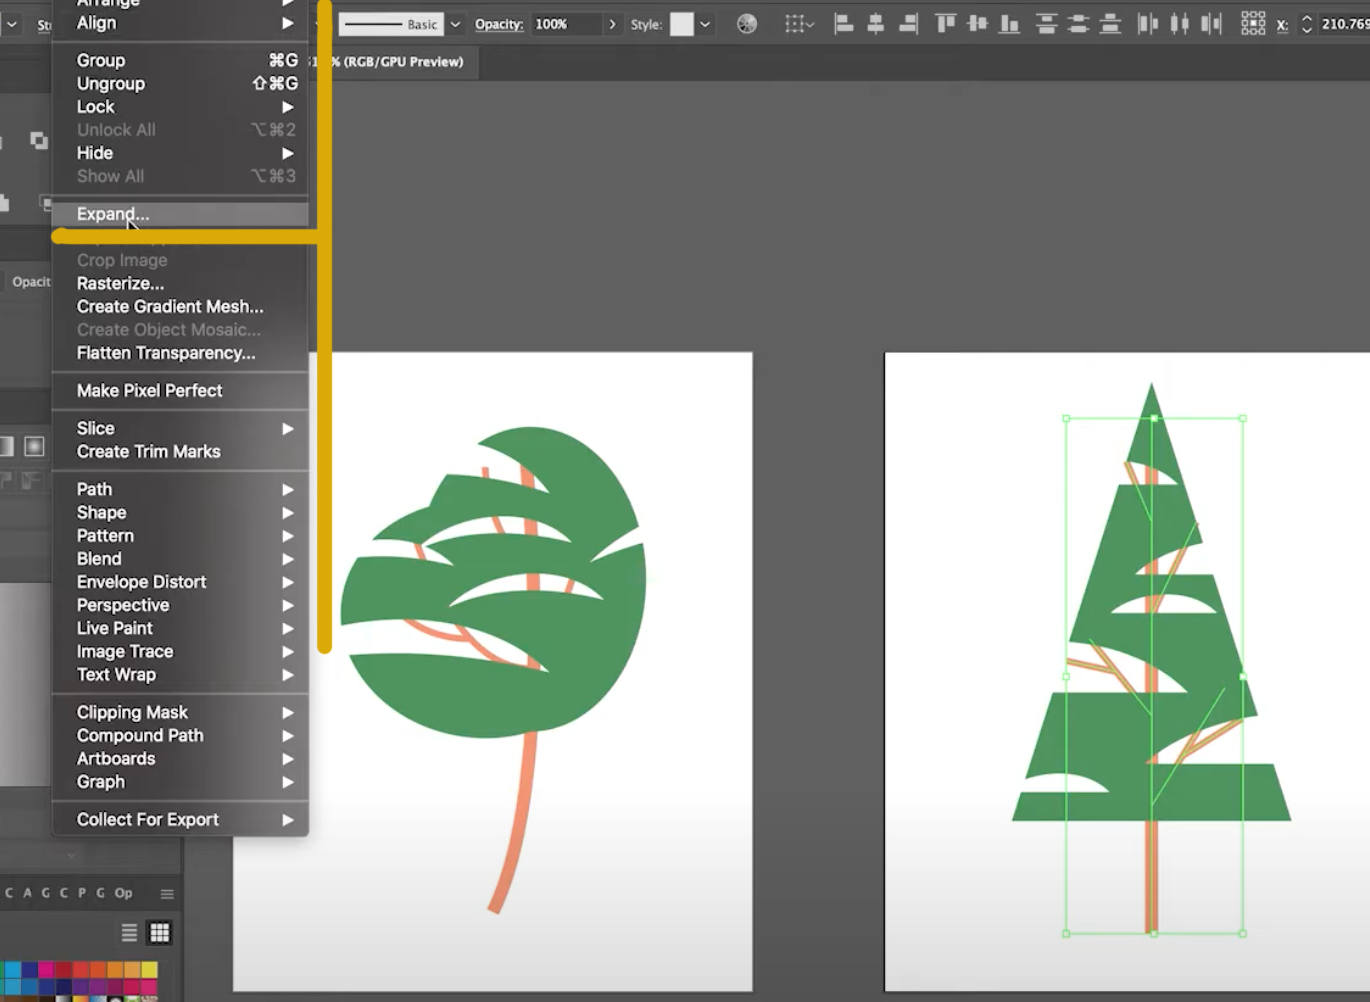
First, we will make them into shapes. We will do this by selecting the stump and all its branches. We will then go up to the top menu and click Object > Expand then in the pop-out window OK.
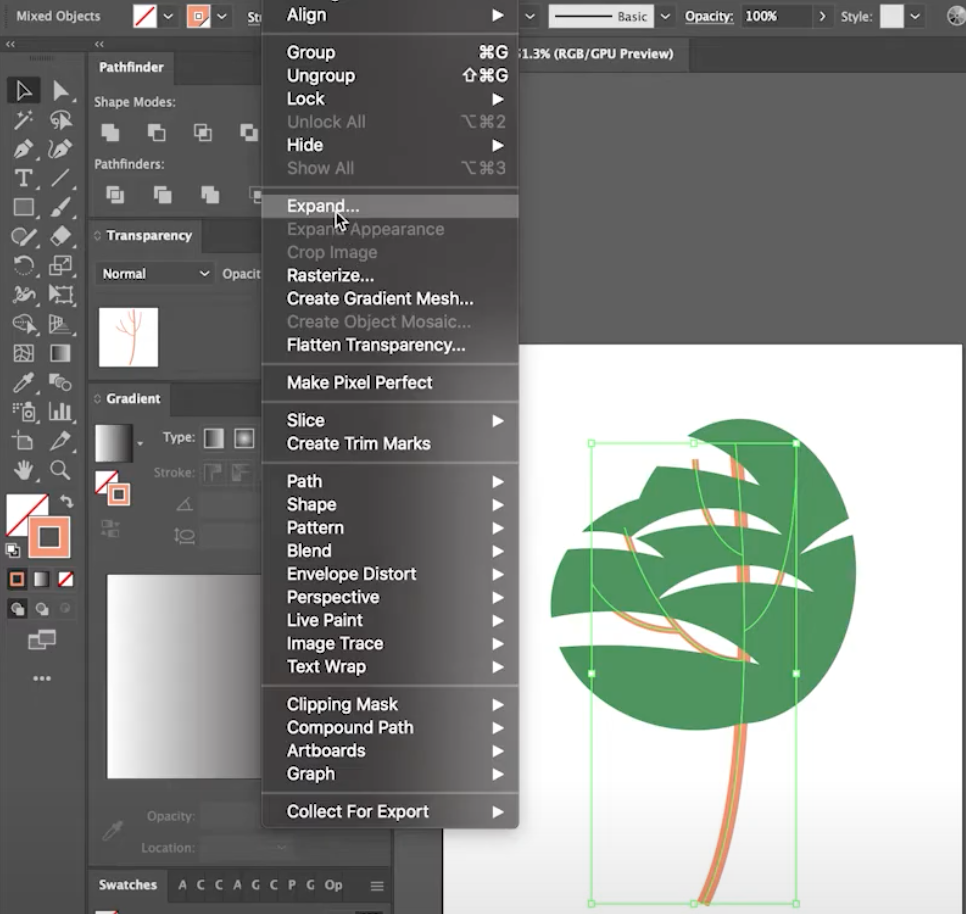
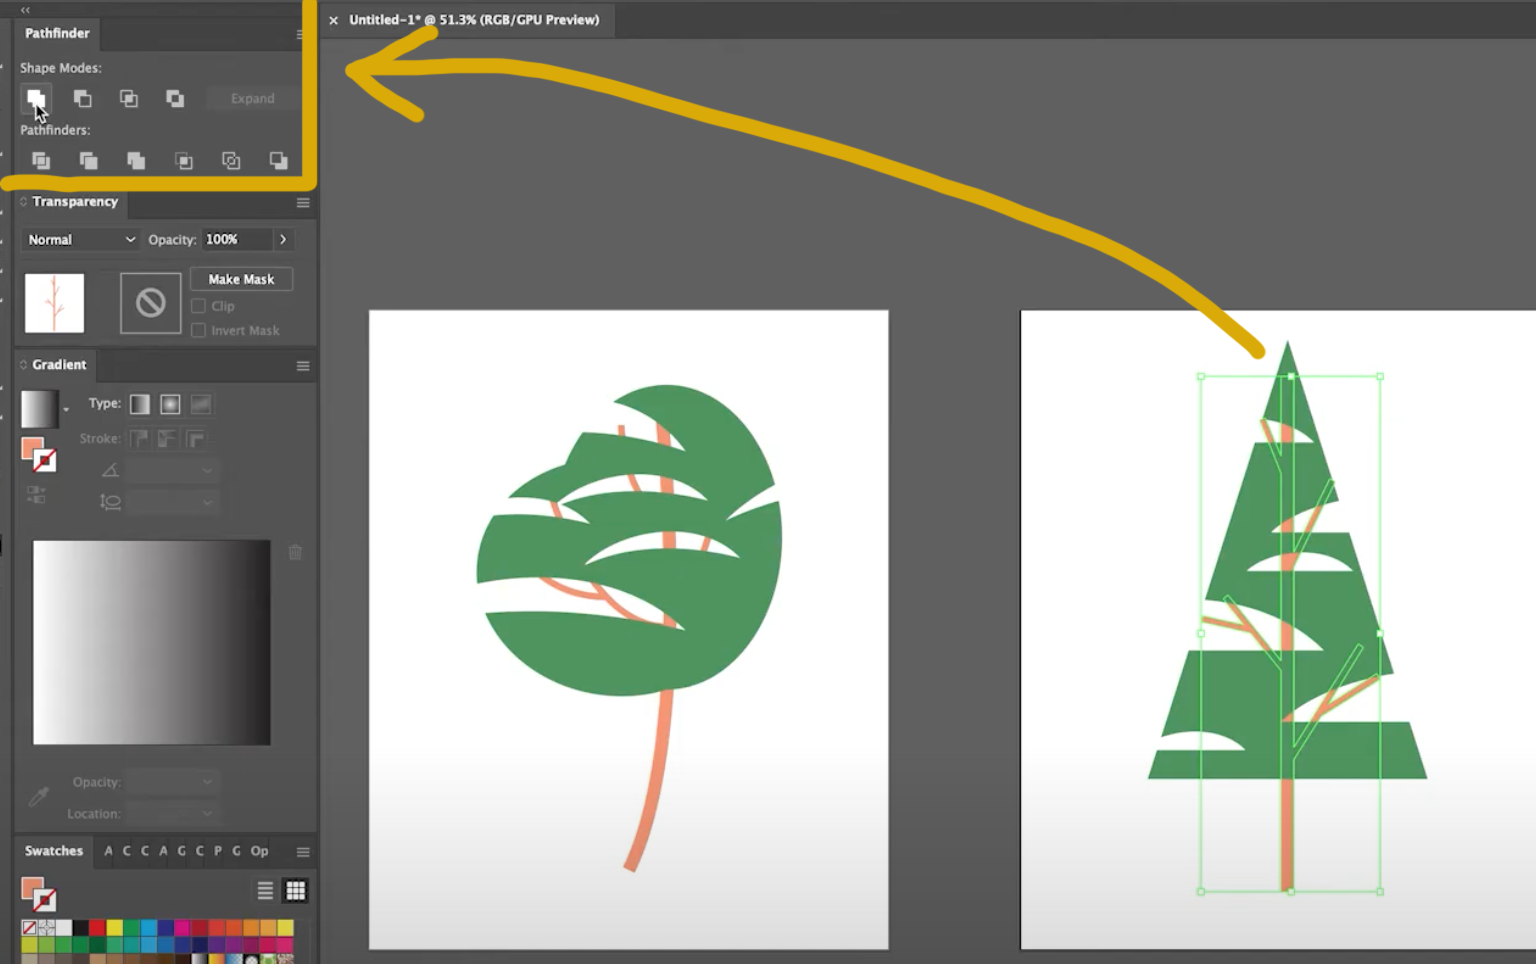
We will then turn them into one shape. With all the shapes still selected, we will go into Pathfinder and click on the Unite Tool.
Pine Tree
For the pine tree’s stump, we’ll start by creating a point at the top of the tree. We will hold down shift to keep our line straight and we create the second point further beneath the greenage shape.
The branches will have the branches straight too. Using the pen tool, create the branches by going to the edge of the greenage shape for the first point and back on the stump for the second point.
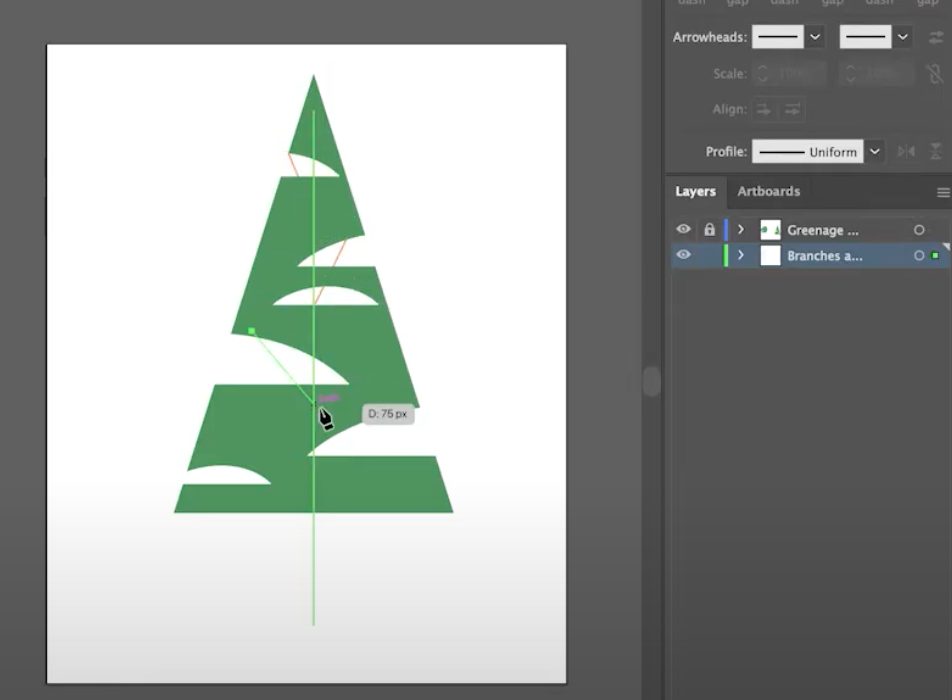
When the stump and branches are set to their appropriate weight, we will combine them all into one shape.
First, we will make them into shapes. We will do this by selecting the stump and all its branches. We will then go up to the top menu and click Object > Expand then in the pop-out window OK.
We will then turn them into one shape. With all the shapes still selected, we will go into Pathfinder and click on the Unite Tool.
6. Greenage Shadows
Shadows and highlights will help us add more depth and playfulness to our creation.
Puffy Tree
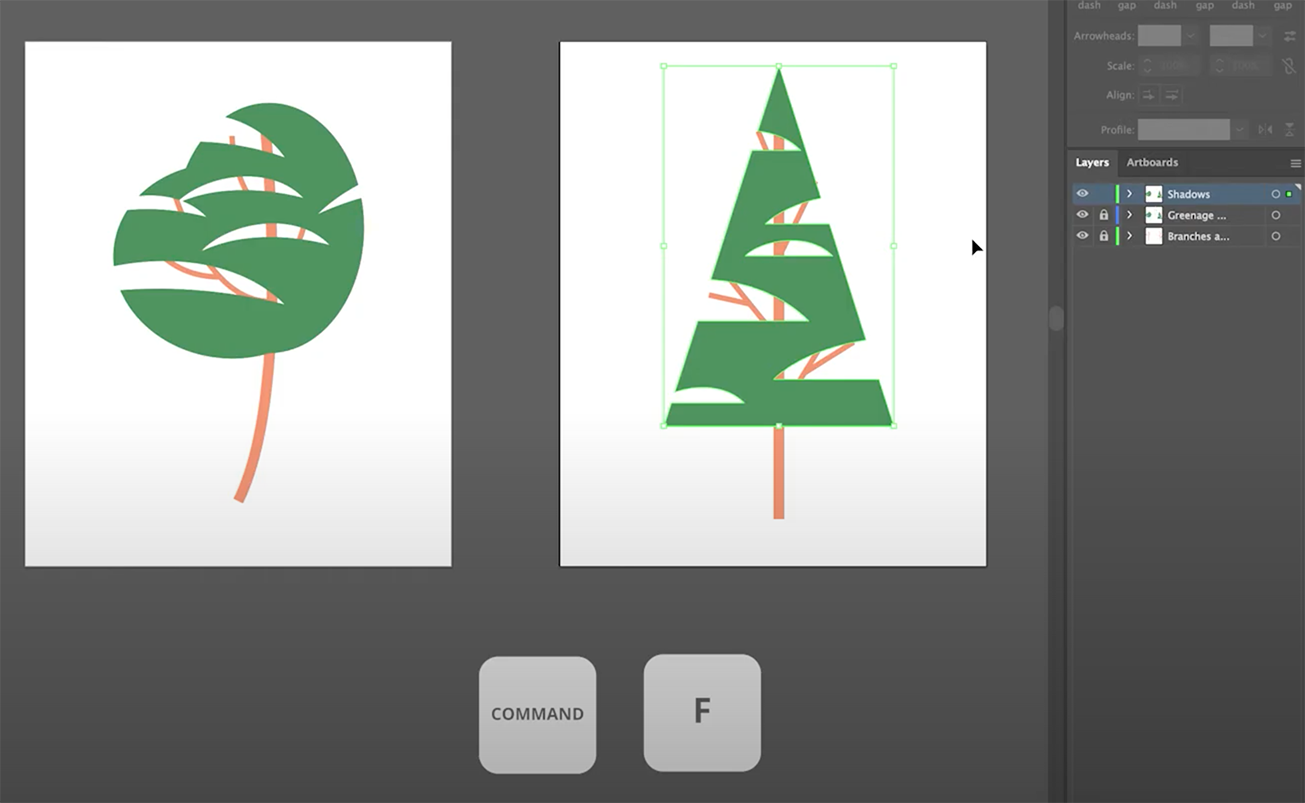
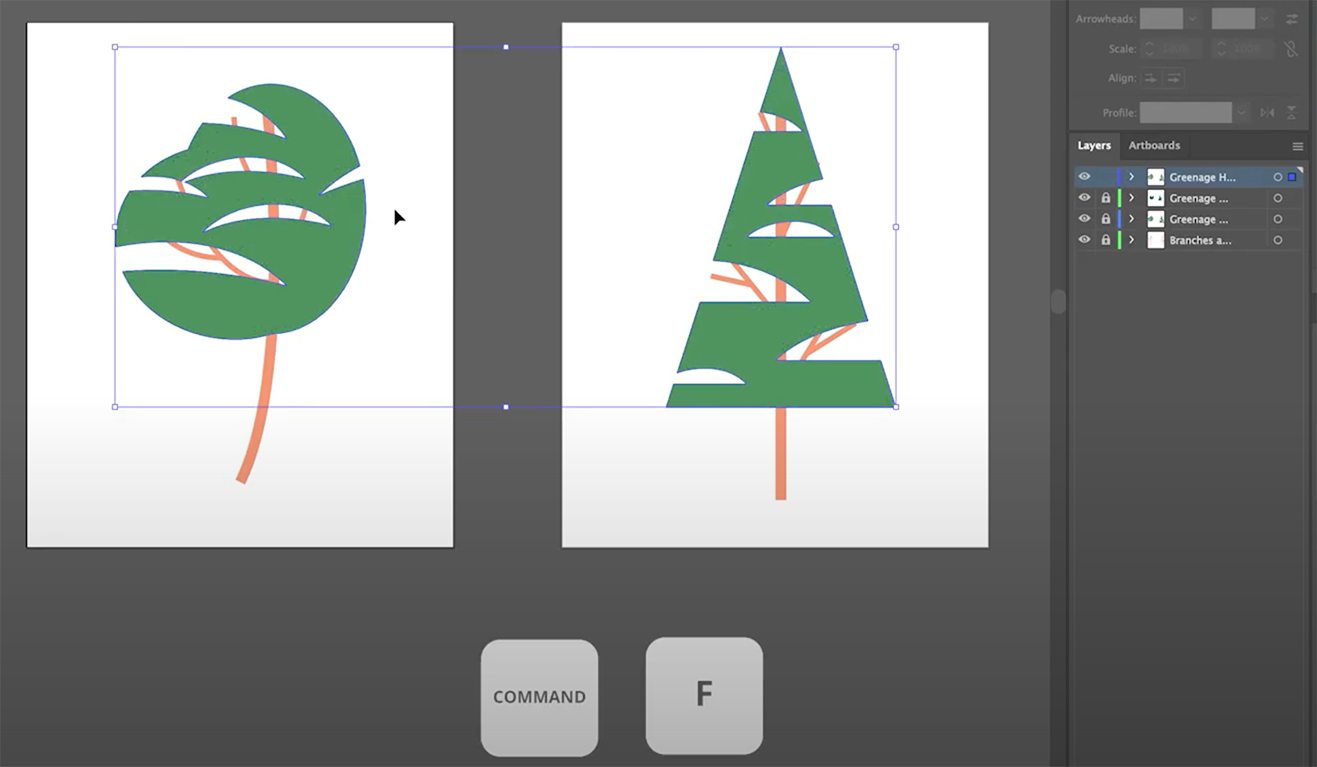
Let’s create the greenage shadows first. We’ll lock all of the layers we aren’t working with at the moment, then we’ll create a new layer and name it. We are going to contain our shadows inside our greenage shapes, so we’ll go into that layer and copy the shape over to our shadows layer with Command+C for copy and Command+F to paste in the same place. Every time before we paste with Command+F, we’re going to lock the layer we do not want and select the layer we do want to paste it in.
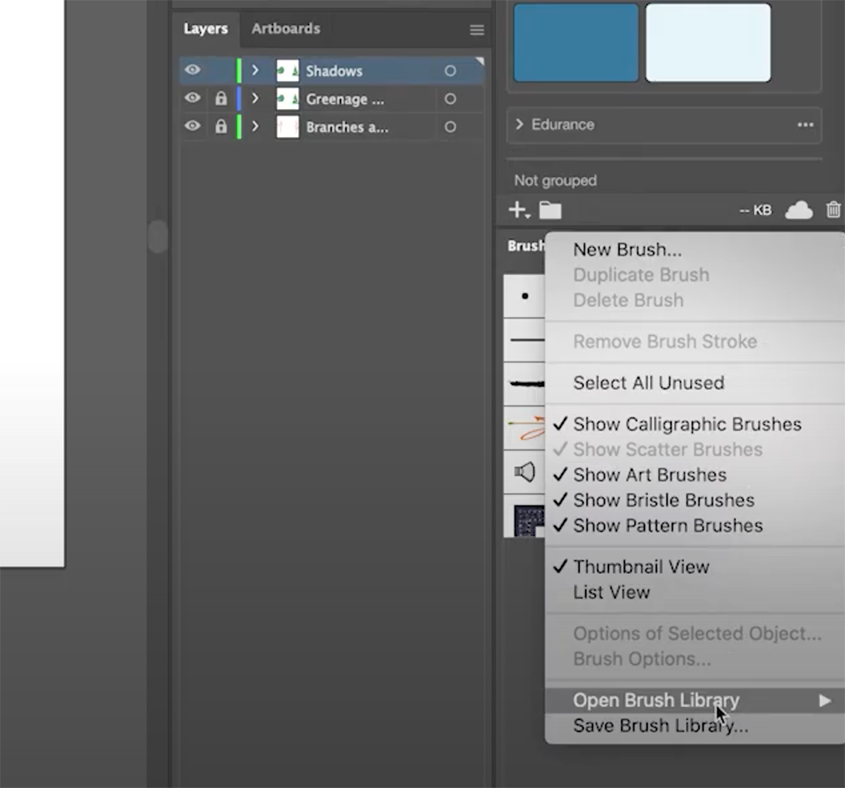
We’re going to go to our brush library and open up a selection of brushes we want to use for the shadows. The ones I use are the Gouache Shader Brushes from RetroSupply, but illustrator has a library of other brushes you can choose from.
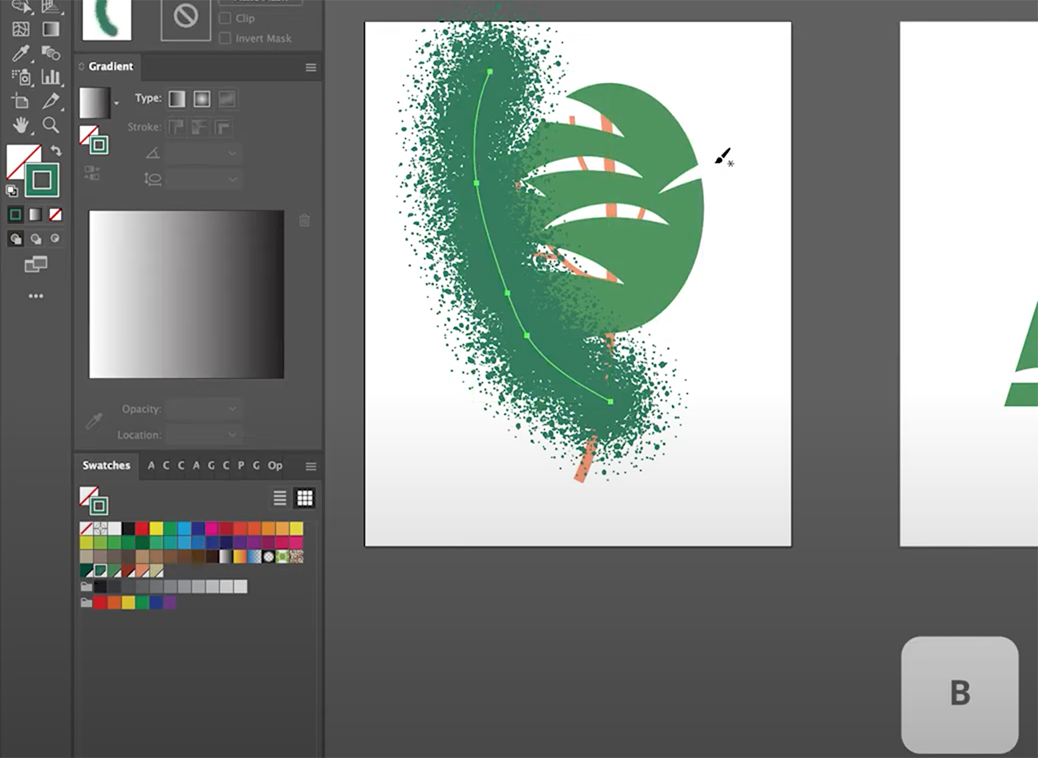
We’re going to take the Paintbrush tool (B) and make a mark where we want our shadow to be. We’re going to change the stroke color to a darker green (#307C5B) and if we do not want it to be a uniform line shadow we will choose a different brush from our brush library. We’ll then make more shadows if needed for this puffy tree.
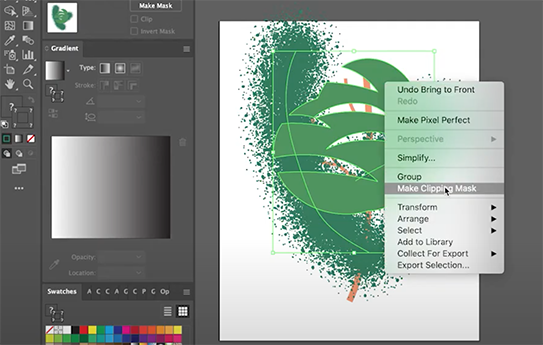
Now we will do the clipping mask to have the shadow within the greenage shape. Select the greenage shape and press Command + Shift+ ] to bring the object to the front, above the brushes. Then we will select the brushes and the shape and right-click. Click on the Make Clipping Mask in the dropdown menu.
Pine Tree
We will make the shadow for the pine tree the same way. With the Paint Brush tool (B) make a mark where we want our shadows to be.
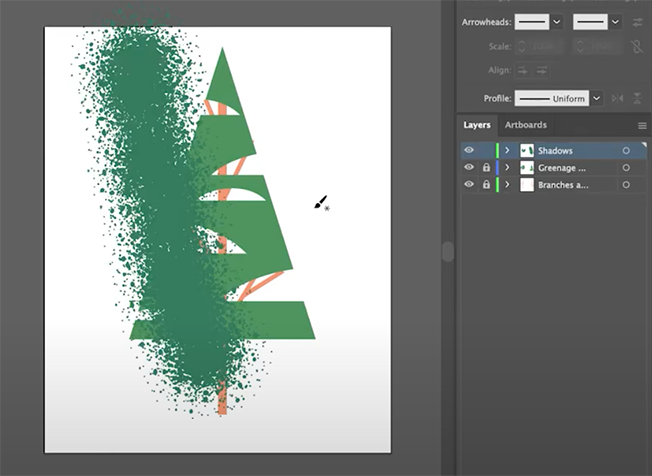
We will make the clipping mask to have the shadow within the pine tree’s greenage shape. Select the shape and press Command + Shift+ ] to bring the object to the front, above the brushes. Then we will select the brushes and the shape and right click to down a menu and click Make Clipping Mask.
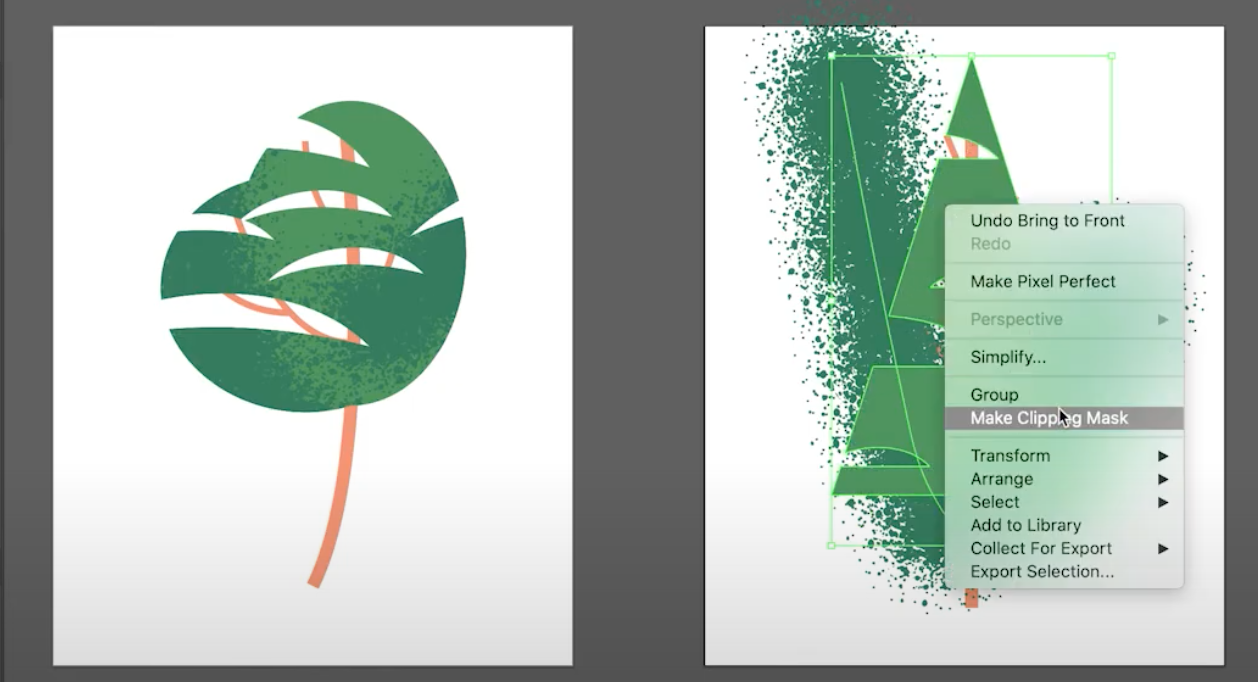
Creating Darker Shadows: Puffy Tree
The shadows are looking good, but let’s make some darker ones.
Right-click on the clipping mask of the puffy tree and click Isolate Selected Clipping Mask. This lets you go inside the mask and makes changes within.
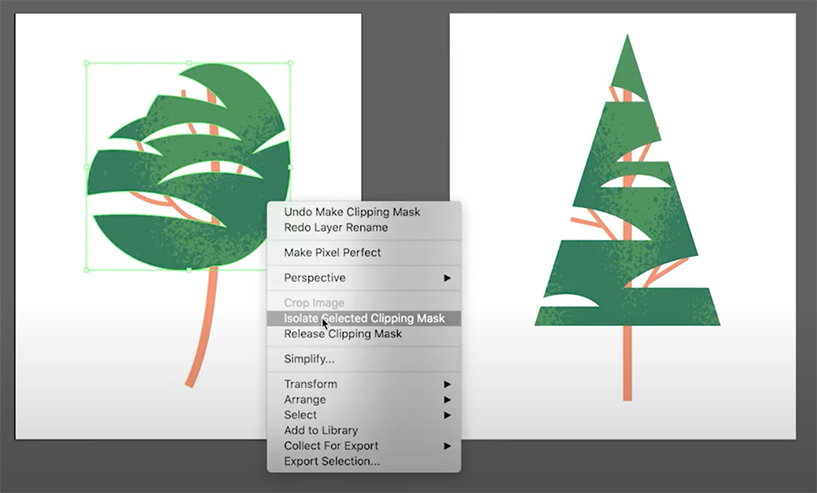
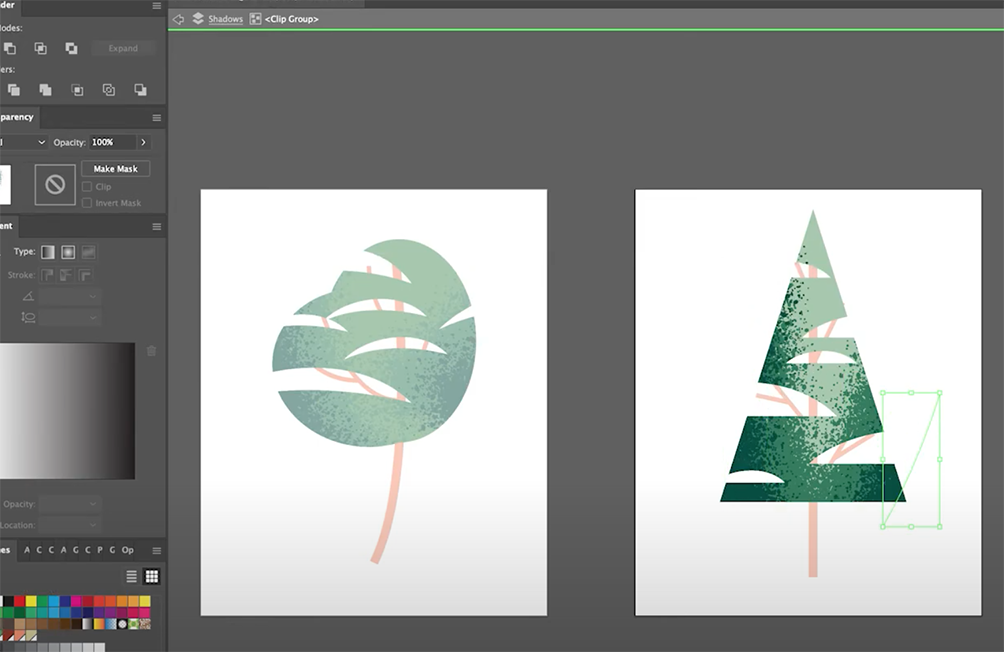
We will copy the shadows we’ve already made by holding down ALT and clicking on one of the brushes and dragging to another position. We’ll then change the color to our darkest green (#034E42). We’ll do this to our other shadow brush. Once, the puffy tree shadow looks okay, we’ll press Delete to get out of the clipping mask.
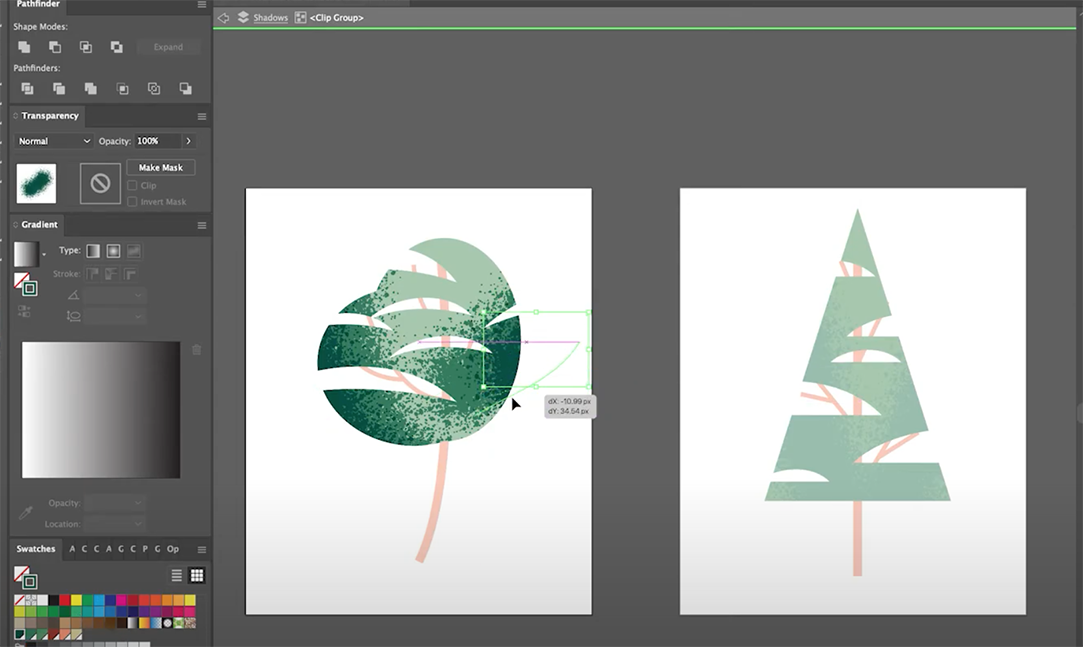
Creating Darker Shadows: Pine Tree
Next, we’ll do the same steps for the darker shadows of the Pine tree. Right-click on the mask and then click Isolate Selected Clipping Mask.
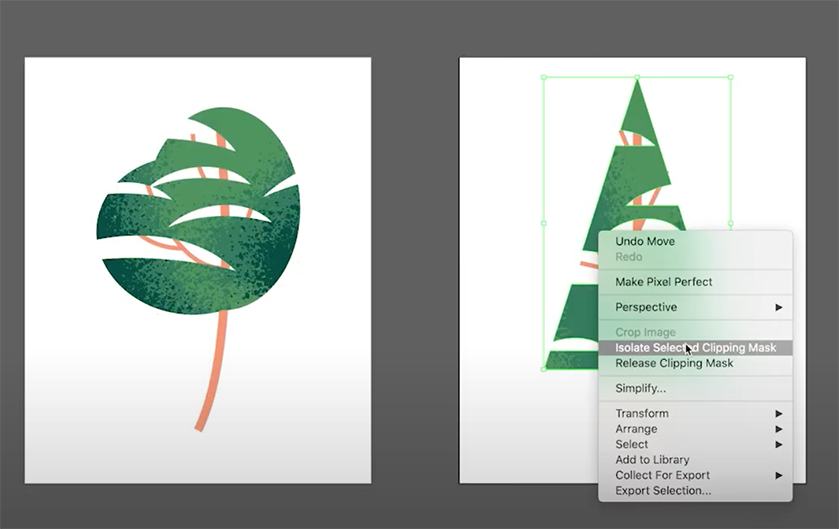
Duplicate the existing shadow by clicking on one of the brushes and holding down alt while dragging it out to another location. Change that brush color to our darkest green (#034E42). Adjust the shadow along the way.
After the Pine tree darker shadows look okay, we’ll press Delete to get out of the clipping mask.
7. Greenage Highlights
Lets create a new layer at the top for highlights and name it greenage highlights. We’ll then lock the shadow layer since we are done with it. We’ll go back to the greenage layer and unlock it to select both of the shapes.
We’ll select and copy (Command + C) both shapes. We’ll lock this layer back and go back to the highlights layer and paste it back in with Command+F.
Since we have the shadows of each tree at the bottom sides, we are going to want the highlights to come down from the top of the tree.
Puffy Tree
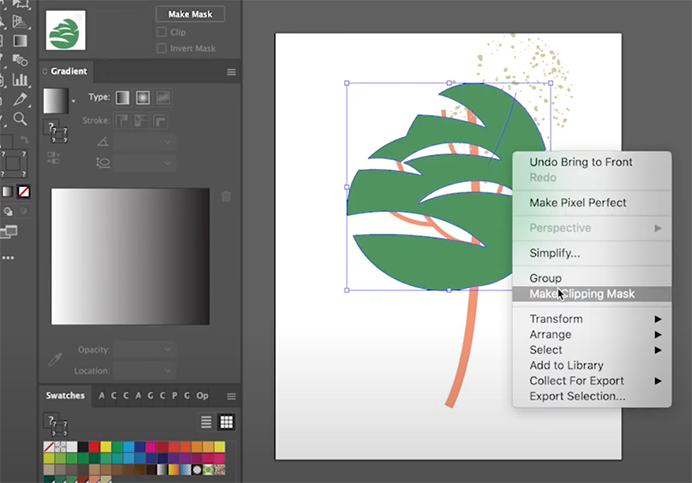
With the Brush tool (B), we will create the highlights the same way as the shadows. We will make a mark and change the brush color to our light greenish yellow (#D4CD96).
We will then adjust the highlights around and we will change the brush to a less dense brush (optional).
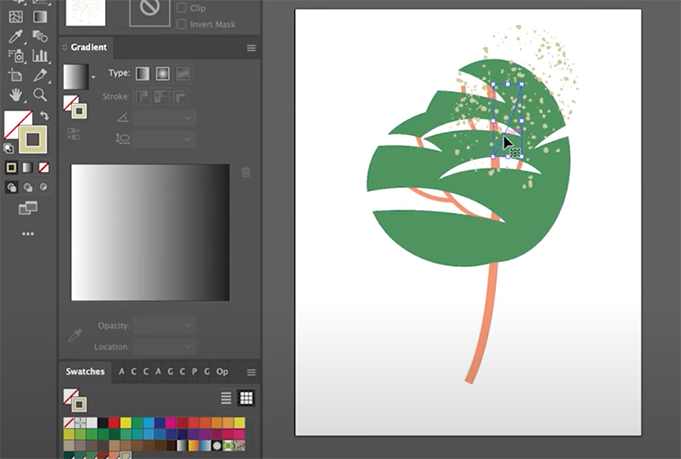
After we are done adjusting, we will bring the greenage shape back to the front (Command + Shift + ]). We’ll select the highlight and right-click, Make Clipping Mask.
Pine Tree
Again, we will follow the same steps for the pine tree.
For the pine tree’s highlights, we will use the Brush tool (B) and mark down from the top of the tree. We will then adjust the brush around until it looks right.
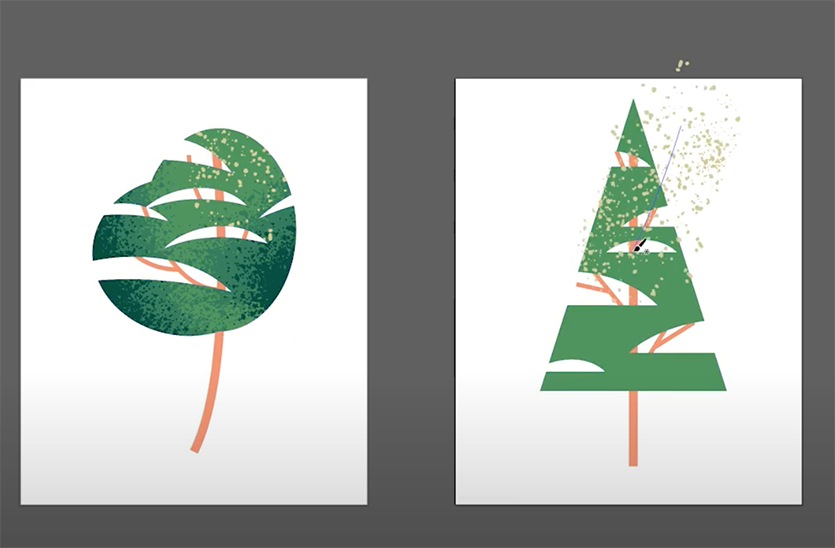
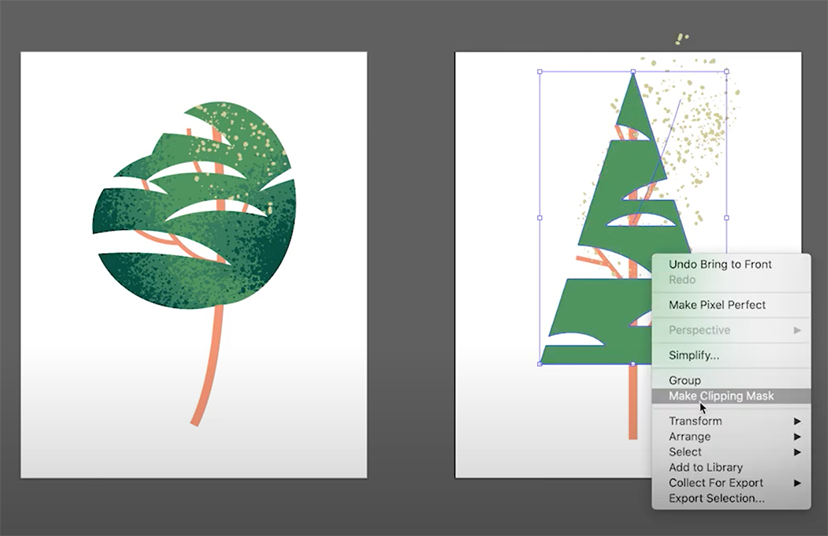
When the highlight brush looks okay, we will bring the greenage shape back to the front (Command + Shift + ]). We’ll select the highlight and right-click, Make Clipping Mask.
8. Branches and Stump Shadows
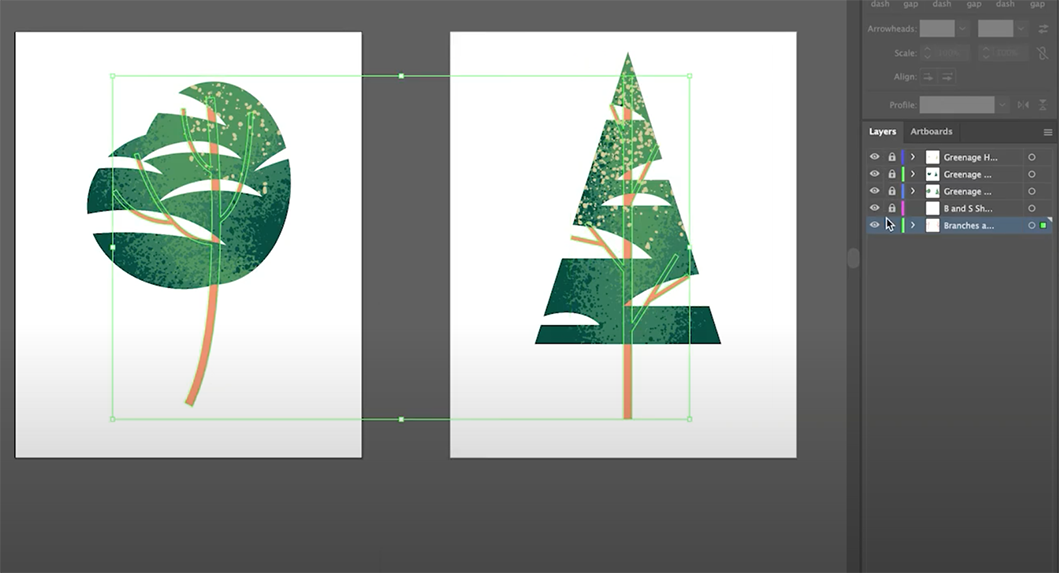
Lastly, we will create shadows for the branches and stumps. Let’s lock all the layers we are not working with and create a new layer above the branches and stumps layer. We’ll name it “B and S Shadows“.
We will unlock the branches and stump layer to select and copy (Command + C) both shapes from it. After, we will lock that layer and paste (Command + F) into our new shadow layer.
Puffy Tree
With the Brush tool (B), we will create shadows below where the greenage is hitting the branches. We’ll need to change the brush color to the dark red (#9A3827). Let’s create the rest of the shadows for the branches of the puff tree and we can adjust the stroke weight for more shadow variations.
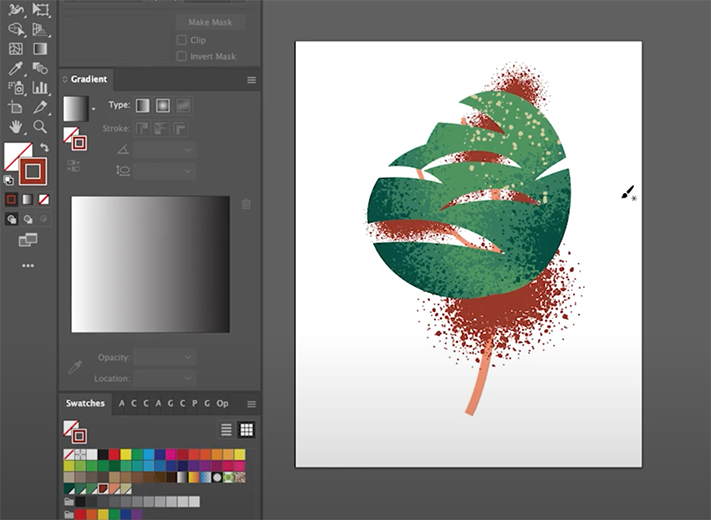
When we have a good shadow for this tree, we will bring the shape to the front (Command + Shift + ]) for the clipping mask and then select everything related to this tree in this layer. Right-click and select Make Clipping Mask.
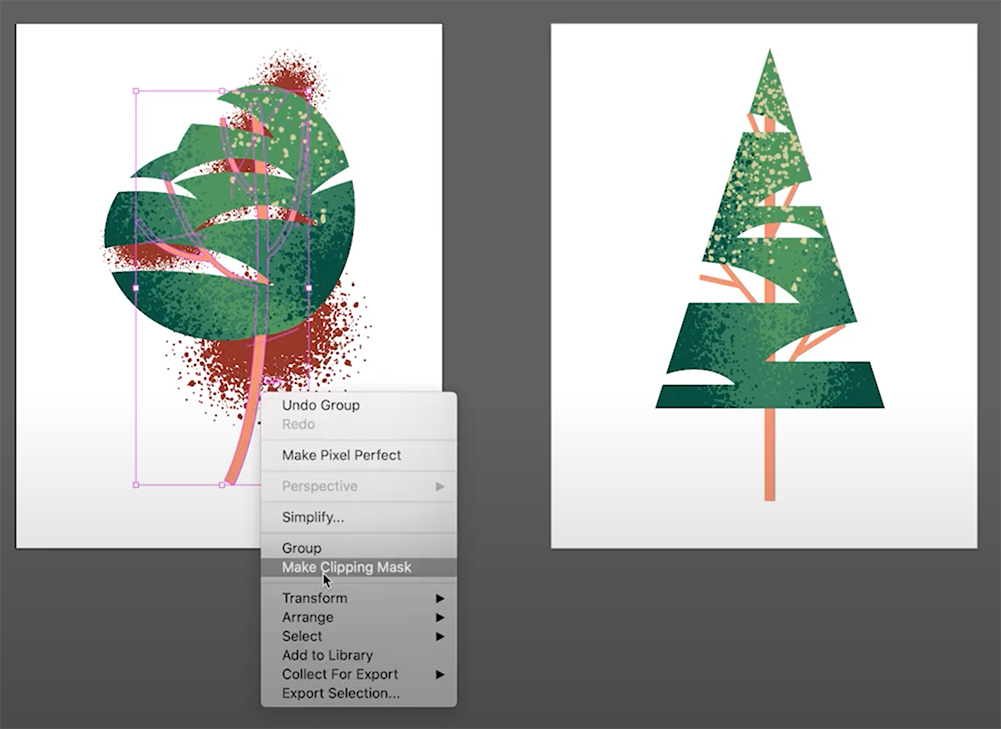
Pine Tree
We will do the same process as the puffy tree for the pine tree shadow. With the Brush tool (B), we will create shadows below where the greenage is hitting the branches. During this step, we can adjust brushes for more variations.
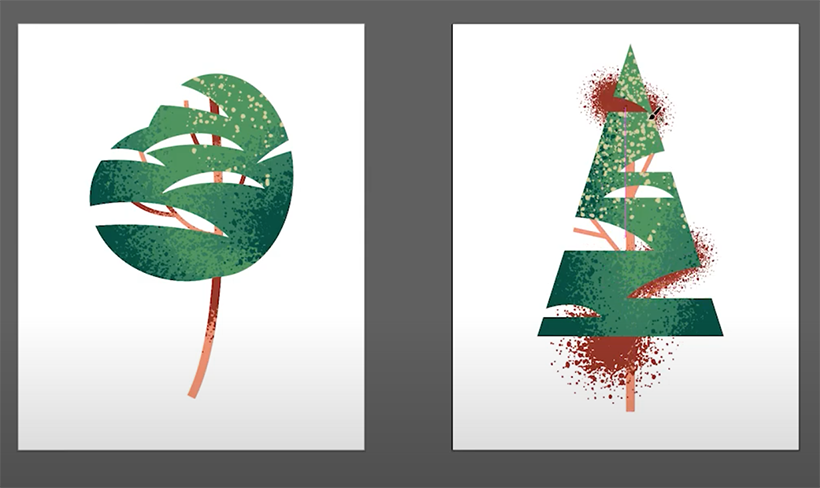
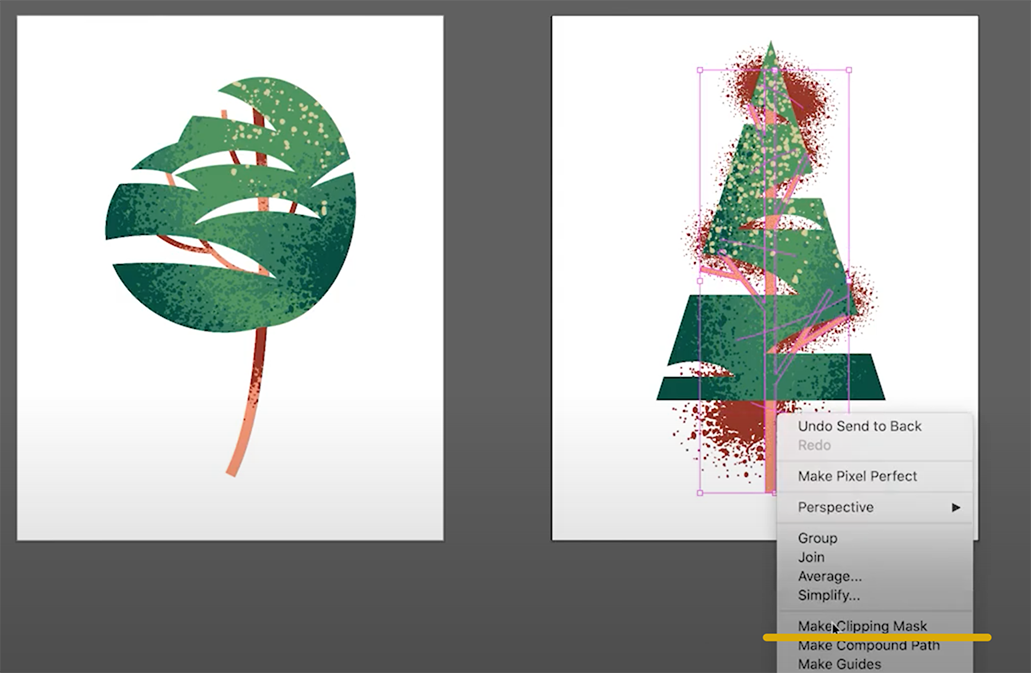
When we have a good shadow for the pine tree, we will bring the shape to the front (Command + Shift + ]) for the clipping mask and then select everything related to this tree in this layer. Right-click and select Make Clipping Mask.
Final Thoughts
There we have it, our two trees.
I hope you found this tutorial helpful. Please leave a comment and let me know what you think. If you tried out the tutorial, I would love to see what you have created. Send me and email or link your illustration in the comment section.

